
The Quest for Potato Perfection Starts in My Kitchen
I’ve made my fair share of potato flops. Soggy bottoms, uneven cooking, bland flavors—you name it, I’ve been there. I made peace with the fact that some recipes take time to master.
Honestly, it wasn’t until I started paying attention to a few key details that my roasted potatoes finally went from “meh” to “wow.” The biggest trick I learned? Roughing them up after parboiling creates more surface area for maximum crispiness. Don’t skip that step! This is what I make on busy nights because I know my family will always eat them!
This is one of my go-to dinners! And it’s so simple. Now, let’s get to the recipe that will change your potato game forever.
Why You’ll Love These Crispy Roasted Potatoes
- They have unbelievably crispy edges with soft, fluffy interiors.
- Quick and easy to make, making it perfect for weeknights.
- Fully customizable with your favorite herbs and spices—don’t overthink this recipe!
- Roasting brings out the natural sweetness of the potatoes.
- They make a fantastic side dish for practically any main course. I make this at least once a week.

What You’ll Need for Crispy Roasted Potatoes
Potatoes
Select Yukon Gold potatoes for their creamy texture and ability to crisp up beautifully. I choose these every time—trust me, this one is worth it. Cut them into similar-sized pieces for even cooking.
Why Yukon Golds? Well, their waxy texture allows them to hold their shape during parboiling and roasting, while still yielding a wonderful creaminess on the inside. Other potatoes, like Russets, can work but tend to be drier. Red potatoes, while flavorful, don’t crisp up quite as well. So, stick with Yukon Golds for the best results. Look for potatoes that are firm, smooth, and free of sprouts or blemishes. Smaller to medium-sized potatoes are generally easier to work with.
Olive Oil
Good quality extra virgin olive oil is key. It’s essential both for flavor and achieving that perfect golden-brown color. You don’t need anything fancy here.
The olive oil not only adds flavor but also helps to conduct heat, ensuring even browning and crisping. Don’t be tempted to skimp on the oil; it’s essential for achieving that coveted crispy exterior. While extra virgin olive oil is my go-to, you can also use avocado oil or even melted butter for a slightly different flavor. If using butter, be sure to watch the potatoes carefully, as butter can burn more easily than oil.
Herbs
I usually use fresh rosemary and thyme, which lend an aromatic touch. But if you only have dried, that also works!
Fresh herbs bring a vibrancy and complexity of flavor that dried herbs simply can’t match. Rosemary and thyme are classic pairings with potatoes, offering earthy and slightly peppery notes. If you’re using dried herbs, use about 1 teaspoon of each, as dried herbs are more concentrated in flavor. Other great herb options include oregano, sage, and parsley. For a Mediterranean twist, try adding a pinch of dried oregano and a squeeze of lemon juice after roasting.
Garlic Powder
Adds a potent savory depth that complements the herbs. I love how fragrant it makes my kitchen smell.
Garlic powder provides a consistent and even garlic flavor throughout the potatoes. While fresh garlic is delicious, it can burn easily when roasted at high temperatures. If you prefer fresh garlic, add it during the last 10 minutes of roasting. Granulated garlic can also be used as a substitute for garlic powder; they are essentially the same thing but with different textures. Don’t be shy with the garlic powder—it really elevates the savory flavor of the potatoes.
Paprika
Smoked paprika gives a subtly smoky flavor that everyone comments on whenever I make these potatoes. Sweet paprika will also work, though!
Smoked paprika adds a wonderful depth of flavor that makes these potatoes truly irresistible. Sweet paprika provides a milder, sweeter flavor, while hot paprika adds a touch of heat. Experiment with different types of paprika to find your favorite flavor. A pinch of cayenne pepper can also be added for an extra kick. Look for high-quality paprika that is bright in color and has a strong aroma.
Salt and Pepper
Sea salt and freshly ground black pepper—don’t skimp! Seasoning is key here.
Salt and pepper are crucial for bringing out the natural flavors of the potatoes and other ingredients. Sea salt is my preferred choice for its clean, bright flavor, but kosher salt also works well. Freshly ground black pepper adds a more complex and aromatic flavor than pre-ground pepper. Don’t be afraid to season generously, but taste as you go to avoid over-salting. A sprinkle of finishing salt, like Maldon sea salt flakes, after roasting adds a wonderful burst of salty flavor and texture.
Optional: Parmesan Cheese
Grated Parmesan cheese added during the last few minutes of roasting gives another crispy, delicious layer. My kids absolutely love this part!
Parmesan cheese adds a salty, nutty, and savory element to the roasted potatoes. It melts and crisps up beautifully in the oven, creating a delicious cheesy crust. Grated Parmesan is ideal for even distribution, but you can also use shaved Parmesan for a more rustic look. Other cheese options include Asiago, Romano, or even a sprinkle of cheddar cheese for a different flavor variation. Be sure to add the cheese during the last few minutes of roasting to prevent it from burning.

How to Make Crispy Roasted Potatoes
Phase 1: Parboiling Perfection
- Step 1: Boil the Potatoes: In a large pot, cover the cut potatoes with cold water. Add a generous pinch of salt. Bring to a boil and cook for about 8-10 minutes, or until the potatoes are slightly tender but still hold their shape.
- Step 2: Drain and Rough Up: Drain the potatoes thoroughly in a colander. Return them to the empty pot and gently toss or shake the pot to rough up the edges—this creates more surface area for crispiness!
- Step 3: Let Them Steam: Allow the potatoes to sit in the colander for a couple of minutes to release excess steam.
Using cold water helps the potatoes cook evenly. Salting the water seasons the potatoes from the inside out. The parboiling time will vary depending on the size of your potato chunks. You want them to be slightly tender when pierced with a fork, but not falling apart. Overcooked potatoes will become mushy during roasting. The roughing-up process is critical for creating a larger surface area for crisping. Be gentle when tossing the potatoes to avoid breaking them apart too much. Letting the potatoes steam dry removes excess moisture, which also contributes to crispiness.
Don’t underestimate the power of a good boil! The goal is to partially cook the potatoes, setting the stage for that perfect crispy exterior and fluffy interior. Think of it as a spa treatment for your spuds, prepping them for the main event. Ensure all potatoes are submerged in water during boiling for even cooking. If you notice excessive starch being released into the boiling water, simply refresh the water once or twice during the process. This helps prevent the potatoes from becoming too sticky.
Phase 2: Season & Coat
- Step 4: Season the Potatoes: In a large bowl, toss the parboiled and roughed-up potatoes with olive oil, rosemary, thyme, garlic powder, paprika, salt, and pepper. Ensure the potatoes are evenly coated with the oil and seasonings.
- Step 5: Arrange and Roast: Spread the potatoes in a single layer on a large baking sheet. Avoid overcrowding the potatoes, as it will cause them to steam instead of roast.
Using a large bowl ensures that the potatoes are evenly coated with the oil and seasonings. If you don’t have a large bowl, you can toss the potatoes in batches. Make sure every piece is coated. A single layer on the baking sheet is essential for even browning and crisping. If you’re making a large batch, use two baking sheets. Line the baking sheet with parchment paper for easy cleanup, or use a non-stick baking sheet instead of parchment paper.
Don’t be shy with the seasonings! This is your chance to infuse the potatoes with flavor. To make sure every potato is coated evenly, consider drizzling the olive oil over the potatoes first, tossing, and then adding the dry seasonings. This helps the seasonings adhere better. Experiment with adding a touch of lemon zest for a brighter flavor, or a pinch of red pepper flakes for a spicy kick. Consider adding some freshly cracked black pepper for an extra layer of flavor.
Phase 3: Achieving the Crispy Dream
- Step 6: Roast: Roast in a preheated oven at 400°F (200°C) for 30-40 minutes, flipping halfway through. The goal: irresistibly crispy roasted potatoes—golden brown and crunchy.
- Step 7: Optional: Add Cheese: Add Parmesan cheese only during the last few minutes of roasting if desired. Pay close attention, though—cheese burns quickly!
Preheating the oven is crucial for achieving a consistent roasting temperature. Flipping the potatoes halfway through ensures even browning on all sides. The roasting time will vary depending on the size of your potato chunks and your oven. Keep an eye on the potatoes and adjust the roasting time accordingly. The potatoes are done when they are golden brown and crispy on the outside and tender on the inside. Adding the cheese during the last few minutes prevents it from burning. Feel free to add a sprinkle of fresh herbs after roasting for an extra burst of flavor.
Patience is key during the roasting process. Resist the urge to open the oven door too frequently, as this can lower the temperature and affect the crisping. If you notice the potatoes are browning too quickly, you can lower the oven temperature slightly. For extra crispy potatoes, consider increasing the roasting time by a few minutes. You can also broil the potatoes for the last minute or two, but watch them closely to prevent burning. The sizzling sound coming from the oven will be your happy reward!
Tips & Mistakes for Crispy Roasted Potatoes
- Don’t skip the parboiling step. It sounds like extra work, but this pre-cooks the potatoes and ensures they’re tender inside, preventing that dreaded undercooked center.
- Roast at a High Temperature: High heat is what promotes crisping. Don’t reduce the temperature.
- Don’t overcrowd the pan. Give the potatoes space to roast, not steam. Use two pans if necessary. I had to learn this the hard way—nobody wants steamed potatoes!
- Use the right potato. Yukon Golds are the gold standard of roasting potatoes. They get crispy without drying out. I recently came across an article from www.recipesteen.com that backs me up on this!
Another key tip is to rotate the baking sheet halfway through roasting to ensure even cooking, especially if your oven has hot spots. Lining the baking sheet with parchment paper makes cleanup a breeze. Avoid using foil, as it can sometimes stick to the potatoes. Don’t forget to let the potatoes cool slightly before serving, as they will continue to crisp up as they cool.
Variations and Substitutions for Crispy Roasted Potatoes
- Spice it up: Add a pinch of cayenne pepper or red pepper flakes for a little heat.
- Herb options: Swap rosemary and thyme for oregano, sage, or Italian seasoning. This is comfort food done right.
- Garlic lovers: Use fresh minced garlic, and add it during the last 10 minutes of roasting to avoid burning.
- Sweet potato version: Substitute sweet potatoes for a sweeter, more caramelized flavor.
For spicy potatoes, consider adding a pinch of chili powder or a dash of hot sauce to the olive oil mixture. For a more savory flavor, try adding a sprinkle of onion powder along with the garlic powder. Experiment with different herb combinations to create your own unique flavor. Other vegetables that roast well with potatoes include onions, carrots, and bell peppers. If using sweet potatoes, reduce the roasting time slightly, as they tend to cook faster than Yukon Golds.
For a truly unique twist, consider adding a drizzle of truffle oil after roasting. This elevates the potatoes to a gourmet level. You can also try adding a sprinkle of nutritional yeast for a cheesy, vegan flavor. For a Mediterranean flair, add some chopped Kalamata olives and a sprinkle of feta cheese after roasting. Play around with different combinations to create your own signature roasted potato recipe.
Storage and Reheating
- Fridge: Store cooled roasted potatoes in an airtight container in the refrigerator for up to 3 days. This always disappears fast in my house.
- Freezer: Freezing is not recommended, as the potatoes can become mushy after thawing.
- Reheating: Reheat in a preheated oven at 375°F (190°C) for 10-15 minutes, or until heated through and crispy. You can also reheat them in an air fryer for a quicker option.
To prevent the potatoes from sticking together in the refrigerator, spread them out on a baking sheet to cool completely before transferring them to an airtight container. When reheating, spread the potatoes out on a baking sheet to promote even crisping. Reheating in an air fryer is a great way to restore the potatoes’ crispy texture. You can also reheat the potatoes in a skillet with a little olive oil for a quick and easy option.
When storing leftover roasted potatoes, line the airtight container with paper towels to absorb any excess moisture and help maintain their crispness. To reheat, consider adding a pat of butter or a drizzle of olive oil to the potatoes before placing them in the oven or air fryer. This helps restore their flavor and texture. If you’re short on time, you can reheat the potatoes in the microwave, but be aware that they will likely lose some of their crispness. You can also add other leftover vegetables, such as Brussels sprouts.
Crispy Roasted Potatoes FAQ
Q: Why aren’t my roasted potatoes crispy?
A: The most common reason is overcrowding the pan, which causes the potatoes to steam instead of roast. High temperature is also important for achieving maximum crispiness.
Q: Can I use a different type of potatoes?
A: Yukon Gold potatoes are the best for crispiness because of their texture; however, Russet potatoes can also work well in this recipe.
Q: Can I prepare the potatoes ahead of time?
A: Yes, you can parboil the potatoes ahead of time and toss or coat them in oil and spices, then roast them right before serving. Store them in the fridge, covered, for up to 24 hours. Add a few minutes to the roasting time since they’ll be starting cold.
Q: Can I use dried herbs instead of fresh?
A: Yes, you can! Use about 1 teaspoon of each dried herb for every tablespoon of fresh herbs called for in the recipe. Dried herbs have a more concentrated flavor, so you’ll need less.
Q: What’s the best way to reheat leftover roasted potatoes?
A: To get them crispy again, the best method is to reheat them in a single layer in a preheated oven at 375°F (190°C) for about 10-15 minutes. You can also use an air fryer for a quicker result.
Q: My potatoes are sticking to the pan. What am I doing wrong?
Helpful References:
Related Recipes
Crispy Roasted Potatoes recipe
- Prep Time: 10
- Cook Time: 30
- Total Time: 40
- Yield: 6 servings 1x
- Category: Side Dish
- Method: Roasting
- Diet: Vegetarian, Gluten Free
Description
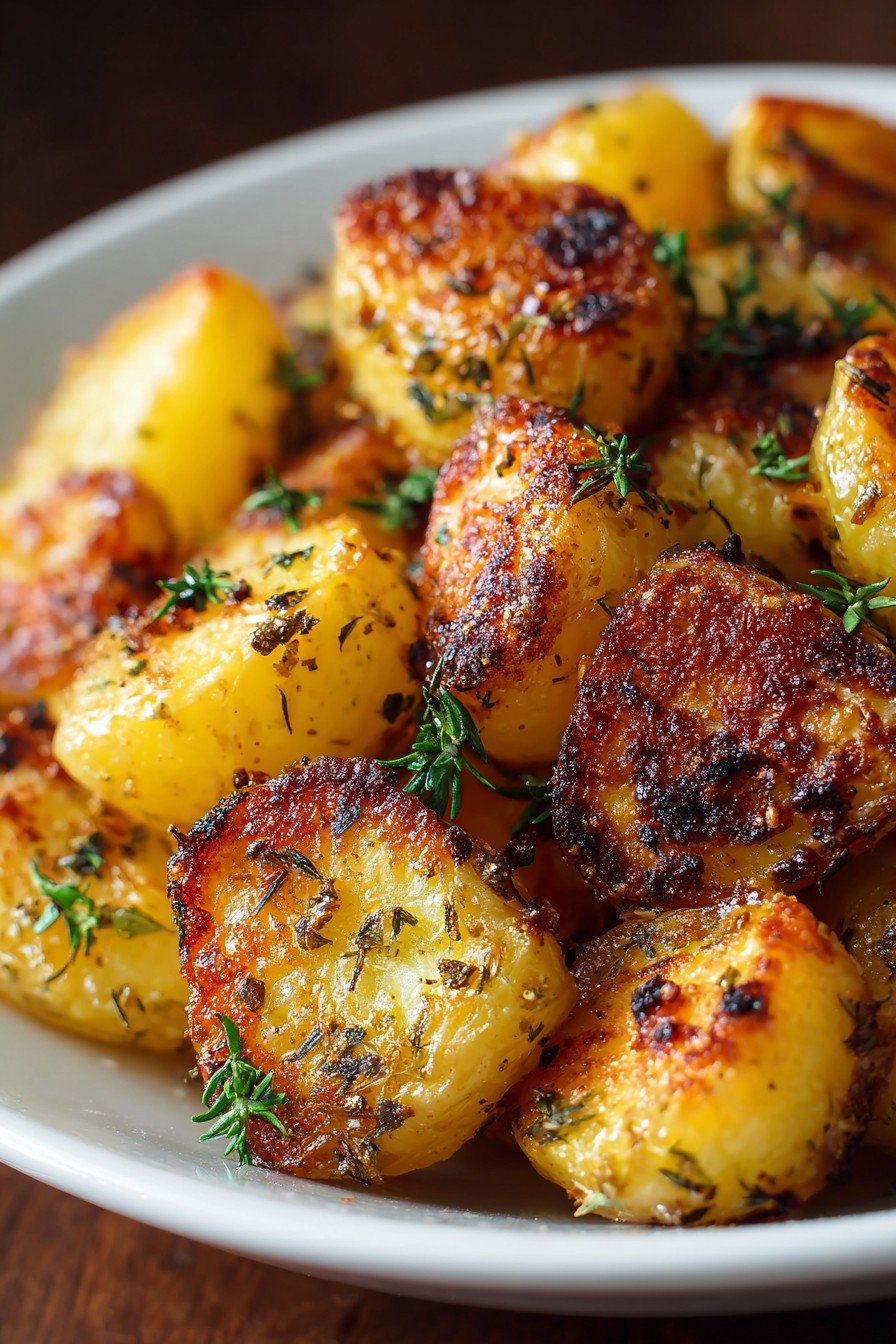
These Crispy Roasted Potatoes are the ultimate side dish, offering a delightful combination of ease and deliciousness. Imagine perfectly golden, shatteringly crisp edges and fluffy, tender insides, creating a flavor that will have everyone craving more. Mastering the art of roasting potatoes involves a few key steps, and this recipe guides you through achieving potato perfection every time. Bbq Wings pair very well with these potatoes!
Ingredients
- 2 lbs Yukon Gold potatoes (cut into 1-inch pieces)
- 4 tbsp extra virgin olive oil
- 1 tsp salt
- 1/2 tsp black pepper
- 1 tbsp fresh rosemary (minced)
- 1 tbsp fresh thyme (minced)
- 2 cloves garlic (minced)
Instructions
- Preheat Oven: Preheat your oven to 400°F (200°C).
- Parboil Potatoes: Place the potatoes in a large pot and cover with cold water. Bring to a boil and cook for 8 minutes. Potatoes should be slightly tender.
- Drain and Rough Up: Drain the potatoes well and return them to the pot. Gently shake the pot to rough up the edges of the potatoes. This creates more surface area for crispiness.
- Season Potatoes: In a large bowl, toss the potatoes with olive oil, salt, pepper, rosemary, thyme, and minced garlic. Ensure potatoes are evenly coated.
- Arrange on Baking Sheet: Spread the potatoes in a single layer on a baking sheet. Avoid overcrowding.
- Roast: Roast in the preheated oven for 30 minutes, flipping halfway through, until golden brown and crispy.
- Check for Doneness: A fork should easily pierce through the center of a potato when they are done.
- Rest (Optional): Let the potatoes rest for a couple of minutes before serving. This allows them to crisp up even more.
- Serve: Serve hot and enjoy!
Notes
- Substitution for Herbs: If you don’t have fresh herbs, use 1 teaspoon of dried rosemary and 1 teaspoon of dried thyme.
- Make-Ahead: Parboil and rough up the potatoes ahead of time and store them in the refrigerator for up to 24 hours before roasting.
- Storage: Store leftover roasted potatoes in an airtight container in the refrigerator for up to 3 days.
- Reheating: Reheat in the oven at 350°F (175°C) for 10-15 minutes or in an air fryer at 375°F (190°C) for 5-7 minutes until warmed through and crispy.
- Serving Suggestions: Serve as a side dish with grilled chicken, steak, or fish. Garnish with additional fresh herbs or a sprinkle of Parmesan cheese.
- Potato Variation: While Yukon Golds are preferred, you can also use red potatoes although their skin won’t get as crispy.
Nutrition
- Array