
They hit that perfect balance between comfort food and something that still feels fresh. The lime cuts through the richness, the spices bring warmth without overwhelming heat, and the mix of textures—soft wraps, juicy filling, stretchy cheese—keeps every bite interesting. If you’ve ever had fajitas that turned out watery or bland, this method fixes that completely.
What makes these Cheesy Chicken Fajita Wraps stand out is how dependable they are. Once you get the method down, you can tweak flavors, adjust spice levels, or swap ingredients without losing that core balance of smoky, cheesy, and fresh. It’s the kind of recipe that becomes second nature after a couple of tries.
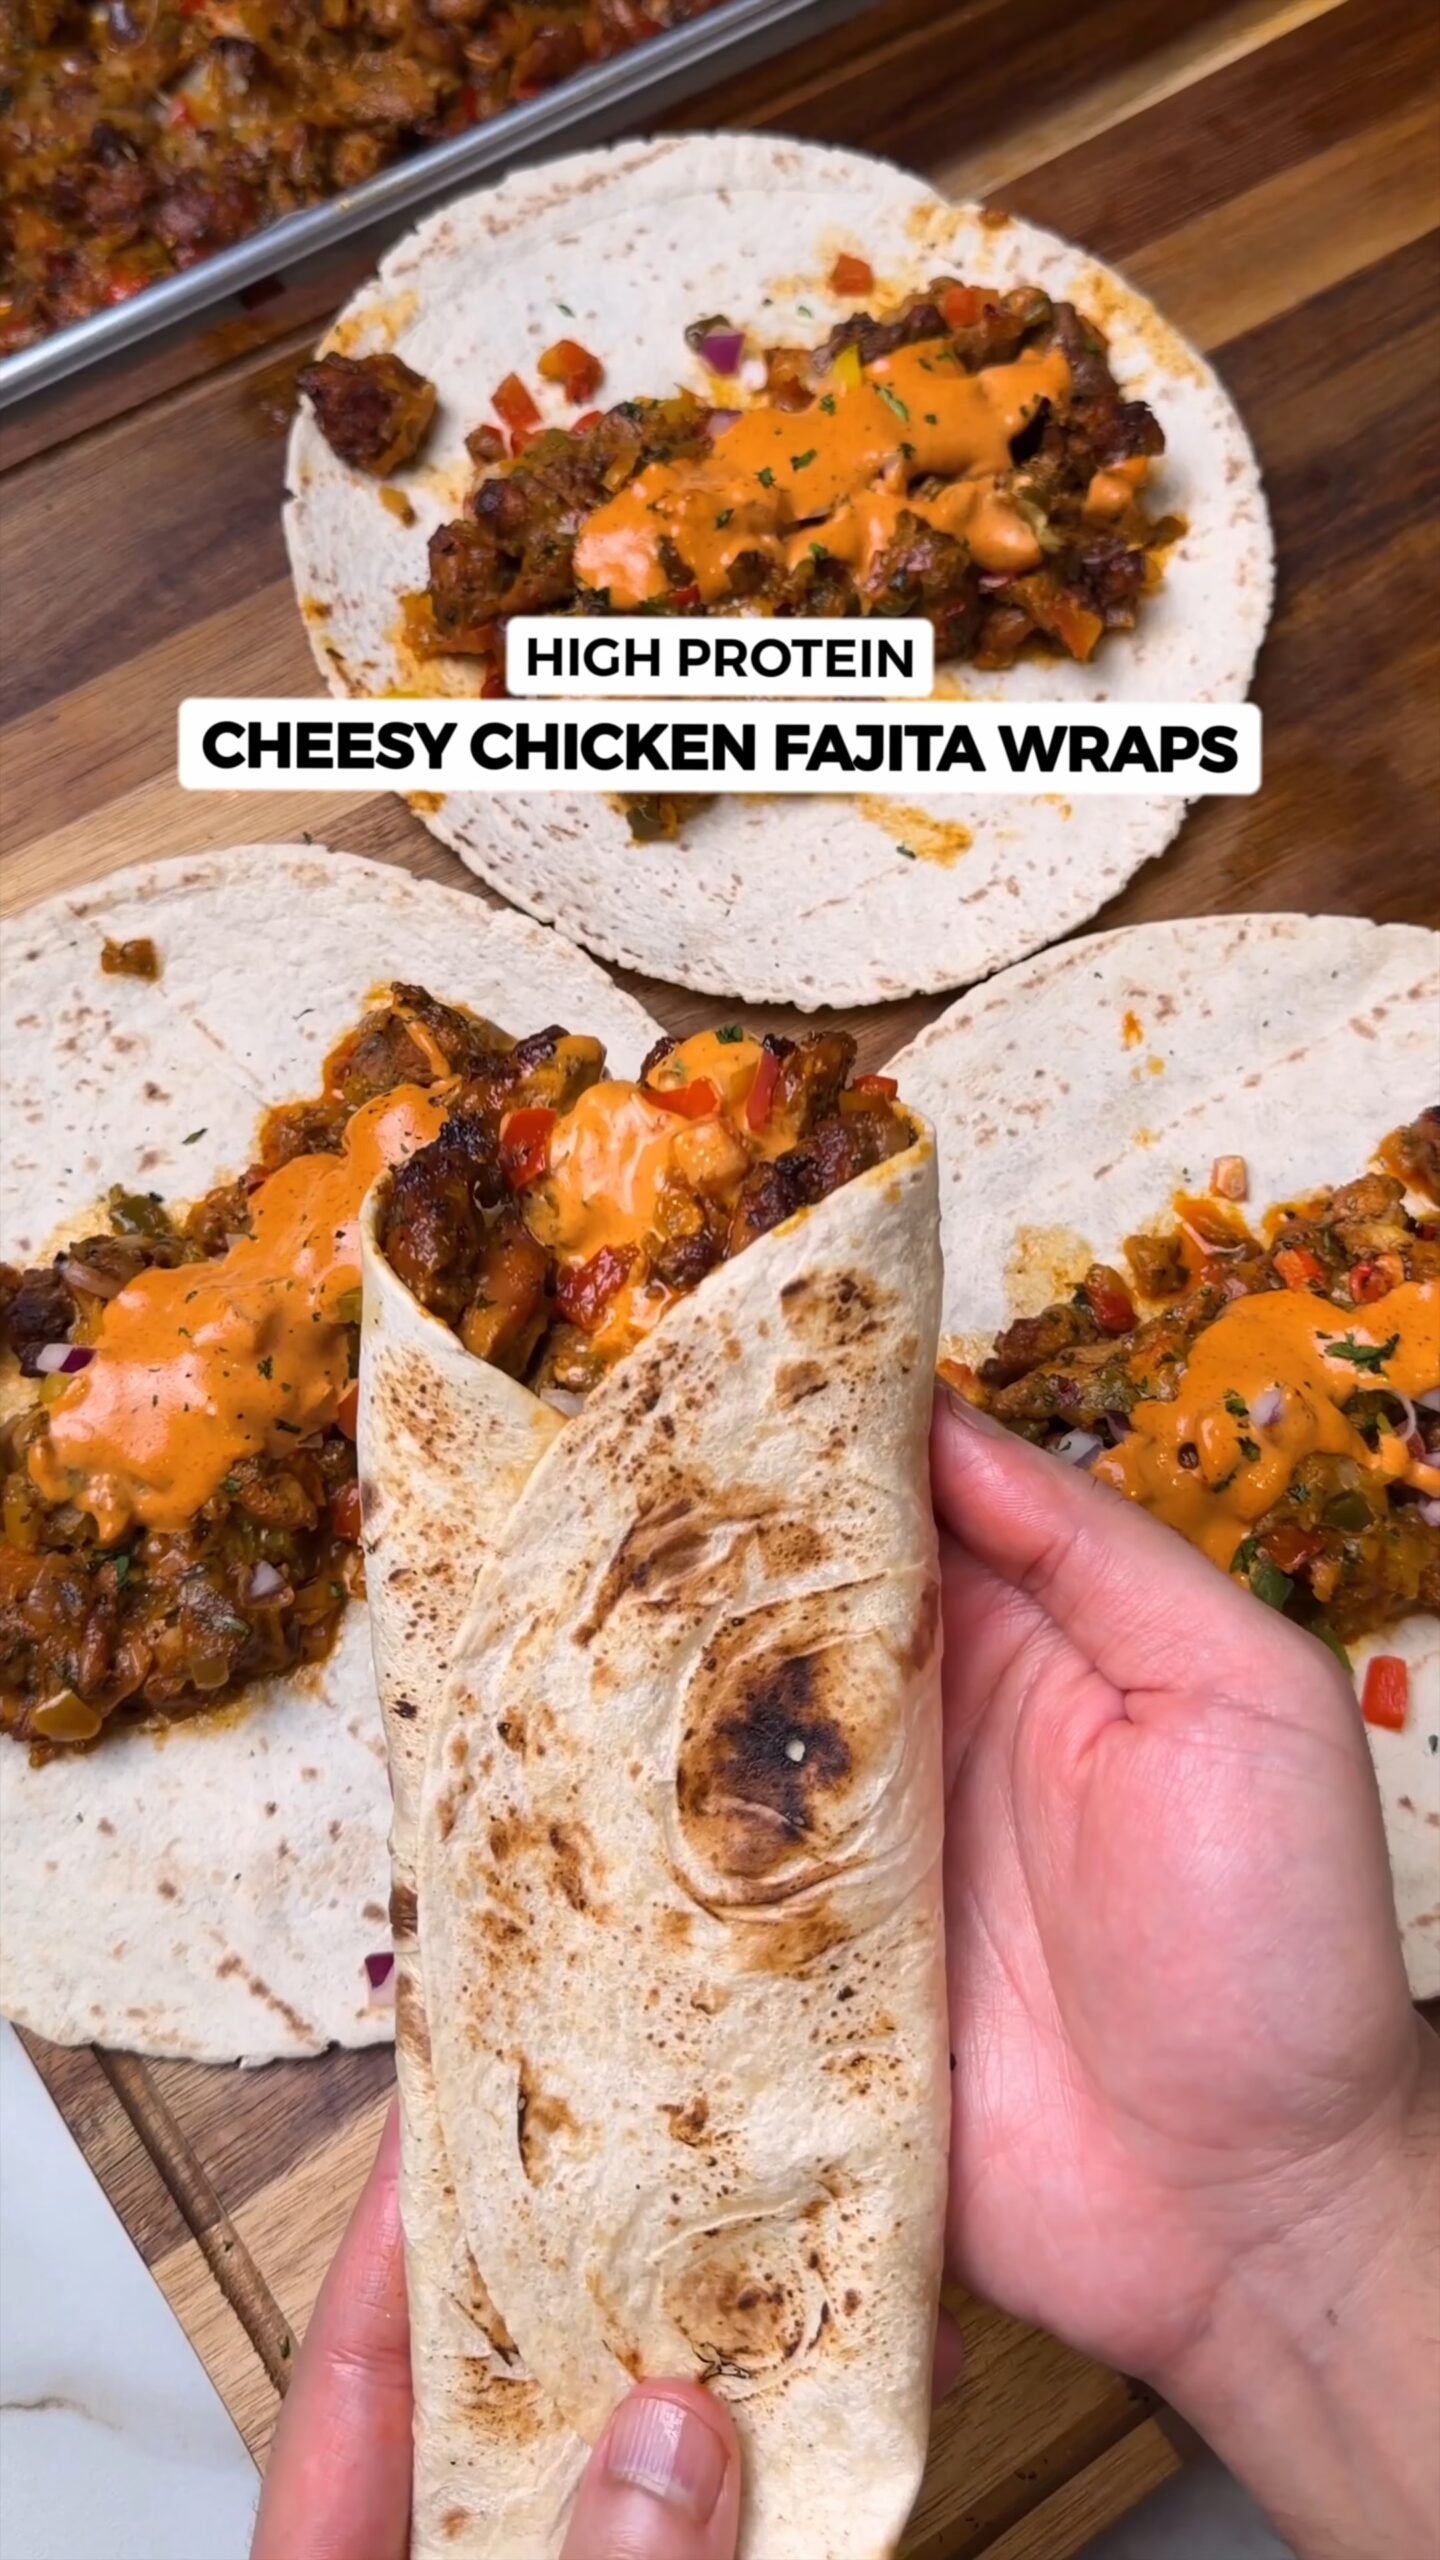
They’re also ideal if you’re trying to keep meals high in protein without feeling restrictive. The chicken and cheese combination keeps you full, while the peppers and onions add volume and natural sweetness. It’s satisfying without feeling heavy, which is why I keep coming back to it.
The sheet-pan trick I rely on when life gets loud
I started making these during one of those weeks where everything felt non-stop—school runs, laundry piles, and three hungry kids asking “what’s for dinner?” at the same time. I needed something hands-off but still exciting enough that nobody complained.
The first time I made it, I threw everything on the tray at once. Big mistake. The veggies went watery, the chicken steamed, and the whole thing tasted… flat. Not terrible, but not what I wanted either.
Now I always roast the vegetables first. That one change gives me those slightly charred, sweet edges and keeps everything from turning soggy. Trust me, this one is worth it. Once I fixed that, this became one of my go-to dinners.
Another small shift that made a big difference was spacing. If the tray is overcrowded, everything steams instead of roasts. I now use a large sheet pan or split things across two trays if needed. It’s a simple adjustment, but it’s what gives you that restaurant-style finish at home.
If your oven runs cool or hot, adjust slightly. You’re looking for visible browning on the edges of the vegetables before adding the chicken. That visual cue matters more than exact timing.
Why You’ll Love This Cheesy Chicken Fajita Wraps
- Big smoky spice with a squeeze of lime that actually cuts through the richness
- Tender chicken with crispy edges plus gooey cheese—every bite has contrast
- Everything cooks on one pan, which means fewer dishes staring at me later
- Great for meal prep; the filling stays juicy and reheats without drying out
- Easy to tweak—swap wraps, adjust heat, or even change the protein
- This always disappears fast in my house, especially when I add extra cheese on top
- Balanced enough for weeknights but still satisfying enough to feel like a treat
- Customizable toppings make it work for picky eaters and spice lovers alike
What You’ll Need
Main Protein / Base
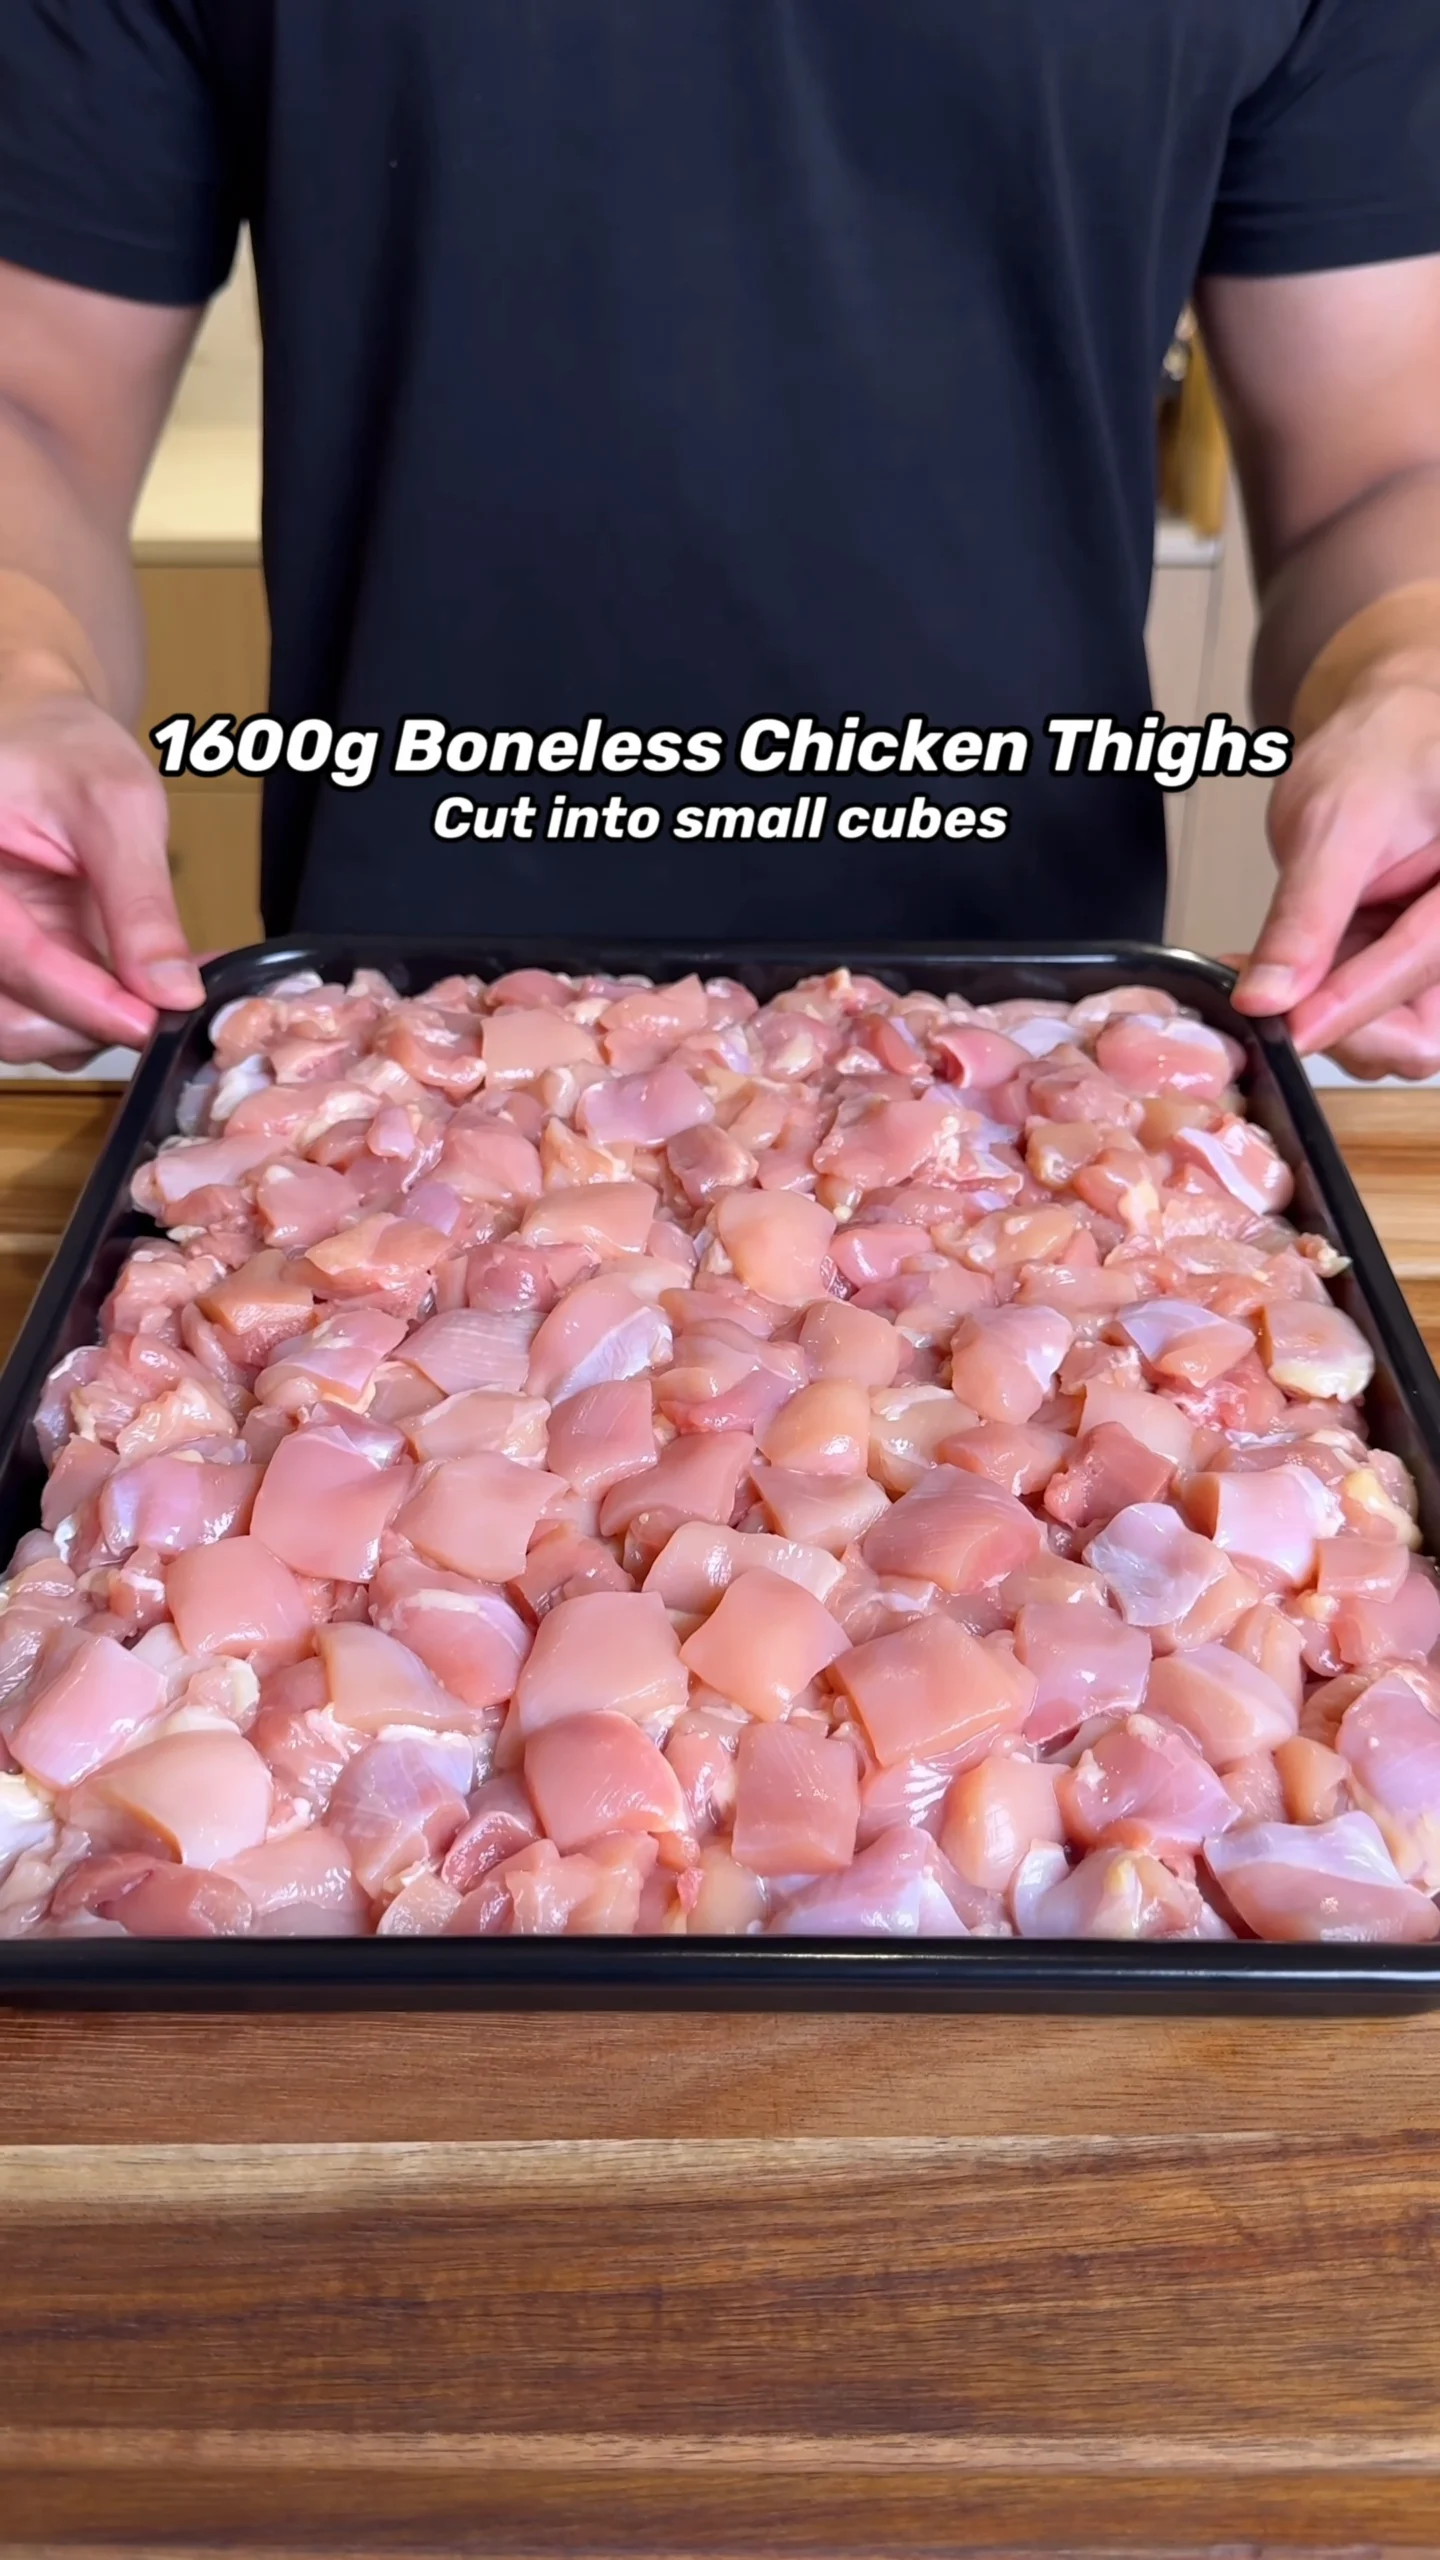
- Boneless chicken thighs (1600g, cubed) — I always choose thighs here because they stay juicy even after reheating. Chicken breast works, but it needs more attention.
Aromatics
- Red onion (200g) — roasts into soft, slightly sweet bites
- White onion (200g) — adds a sharper edge so it’s not all sweetness
Spices
- Salt (3 tsp) — brings everything together, don’t skimp
- Oregano (4 tsp) — that classic fajita flavor you expect
- Garlic powder (4 tsp) — evenly coats without burning like fresh garlic can
- Cumin (3 tsp) — warm and earthy, this is the backbone
- Coriander powder (3 tsp) — adds a light citrus note
- Smoked paprika (4 tsp) — this is the one I always reach for because it gives that deep smoky taste without extra work
- Chilli powder (2–3 tsp) — adjust depending on how brave you’re feeling that day
- Extra fajita seasoning — I sprinkle this on the veg for an extra punch
Liquid or Sauce
- Lime juice (1½ limes) — brightens everything and helps tenderize the chicken
- Olive oil (2.5 tbsp + spray) — helps the spices stick and creates those golden edges
Vegetables or Add-ins
- Bell peppers (150g each red, green, yellow) — sweet, slightly crisp, and colorful
Toppings
- Low-fat cheddar (100g) — sharp and melty
- Mozzarella (100g) — gives that stretchy, cheesy pull
- Fresh tomatoes — juicy contrast
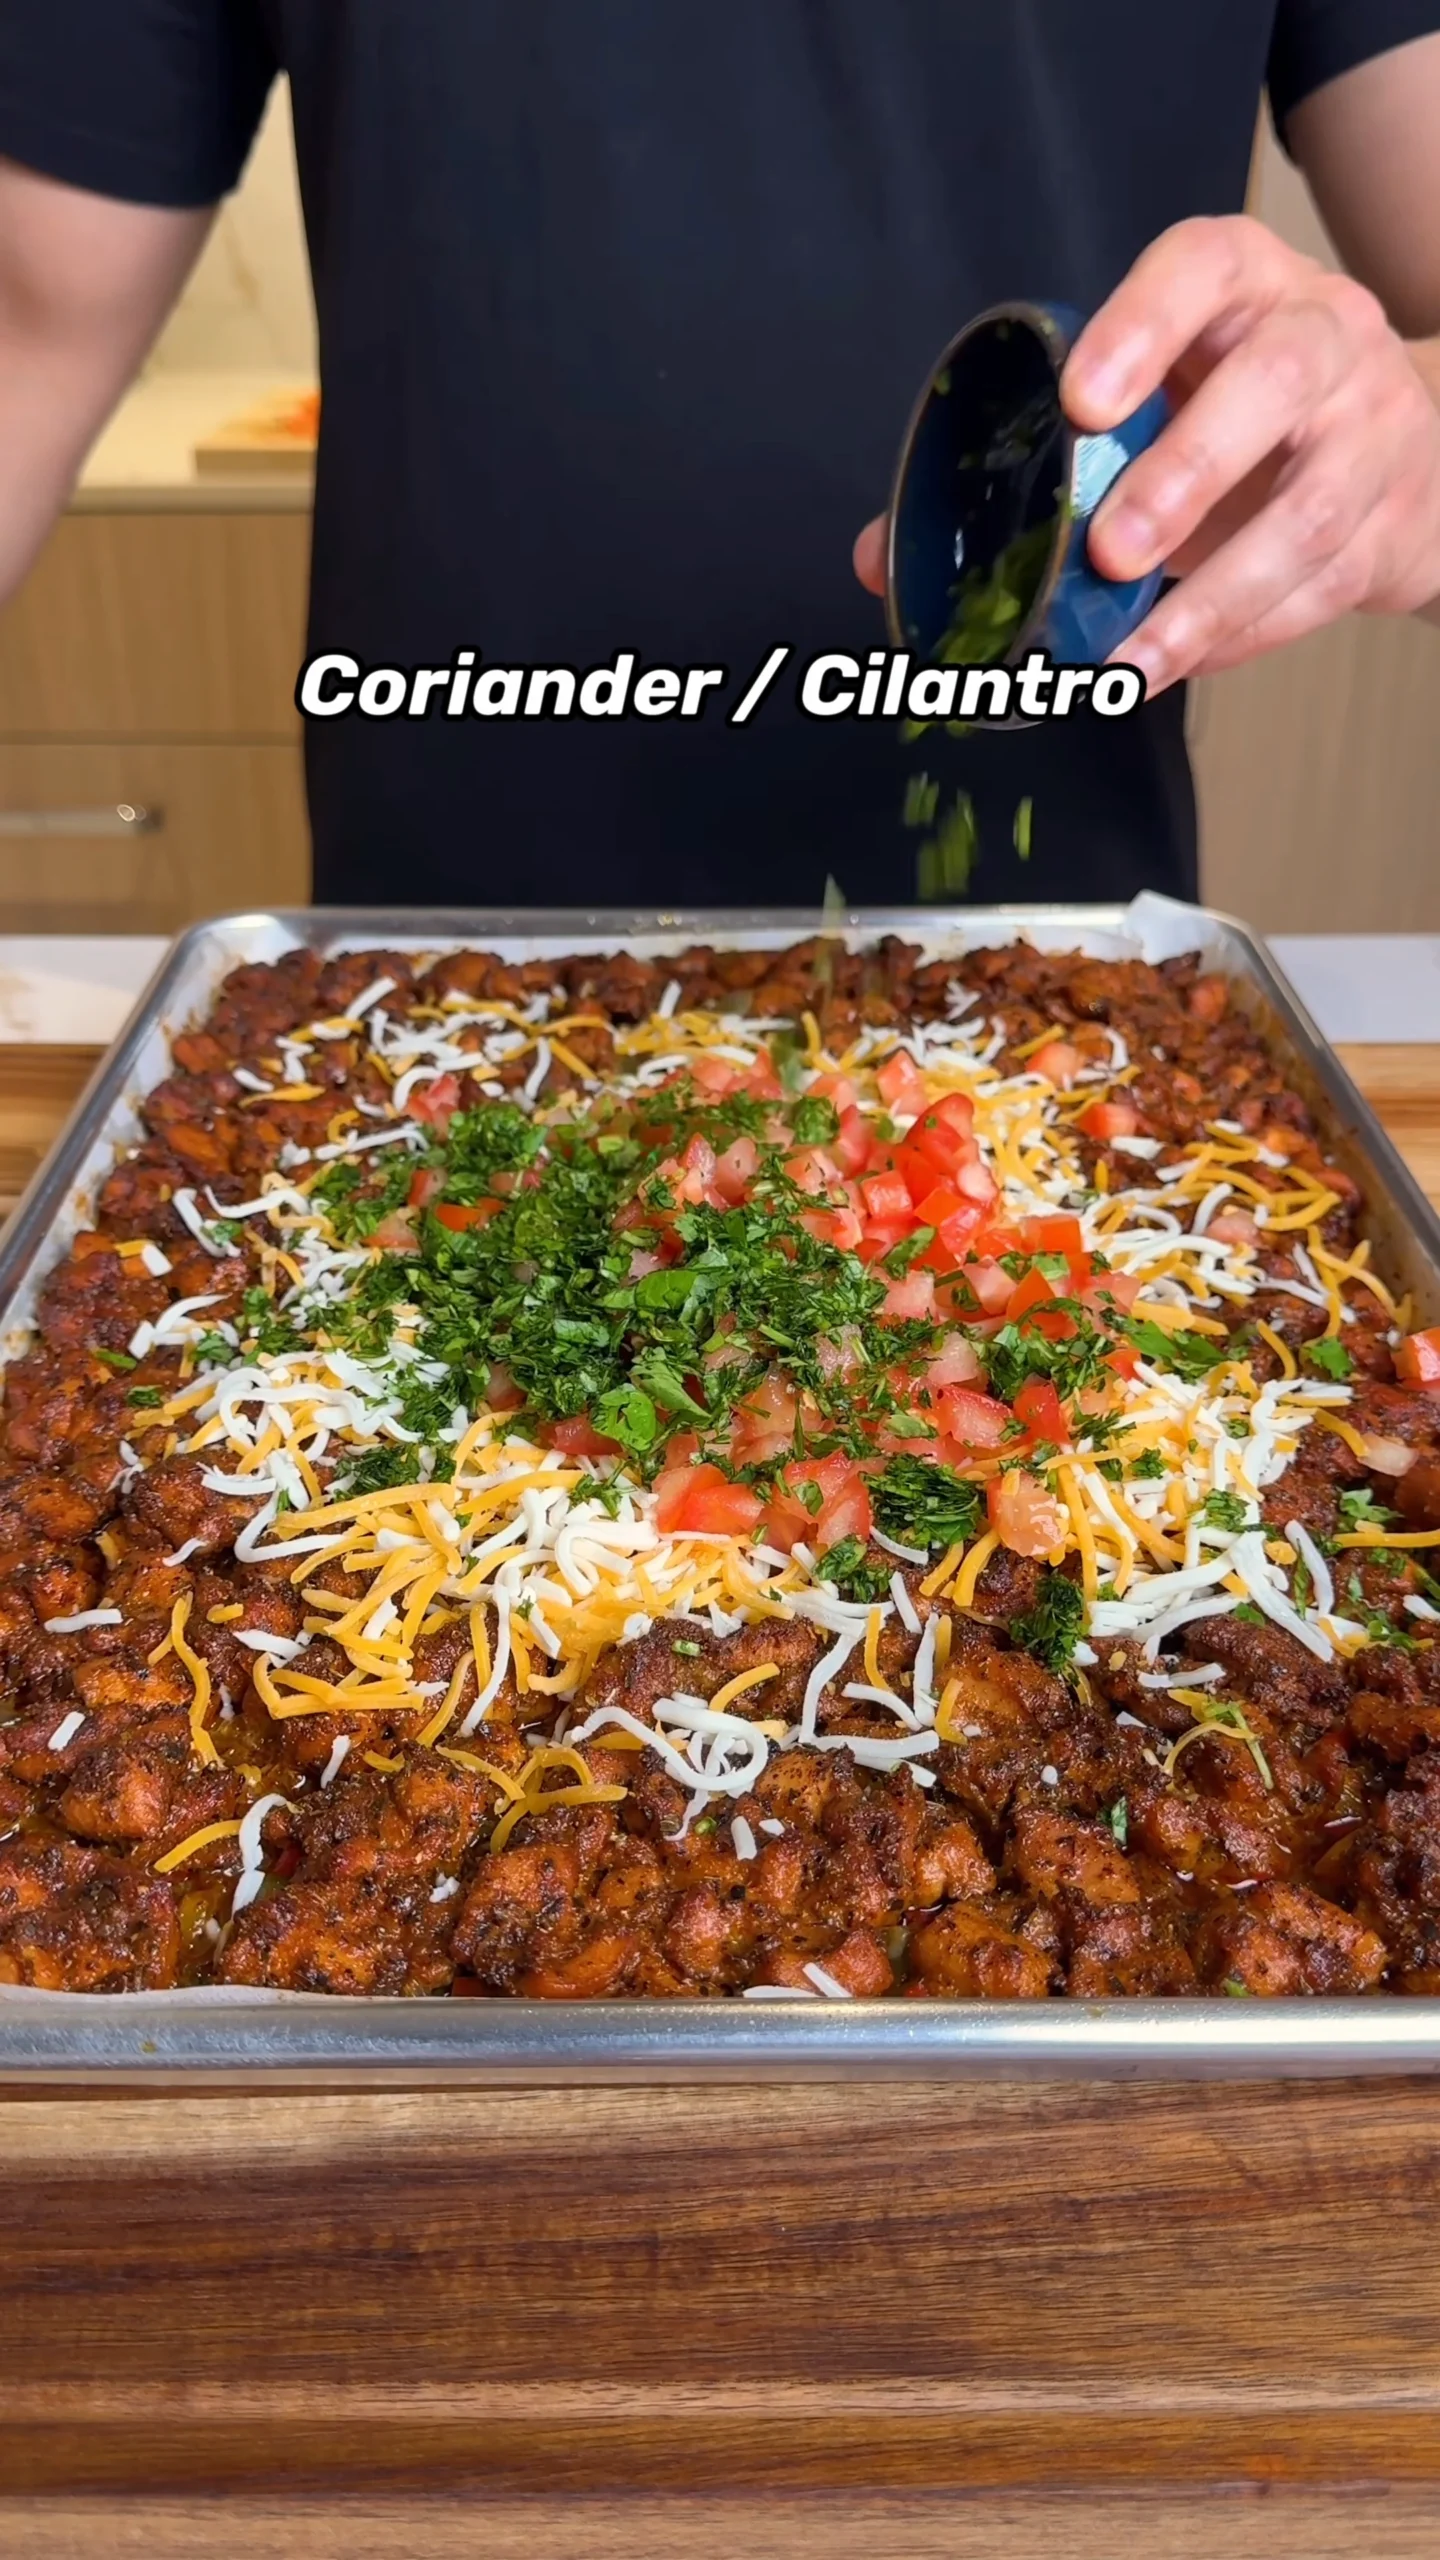
- Fresh coriander — fresh and herby at the end
- Low-carb tortilla wraps — sturdy enough to hold everything without falling apart
Ingredient Tips That Make a Difference
Cut size matters: Keep chicken pieces similar in size so they cook evenly. Too small and they dry out, too large and they won’t develop those crispy edges.
Use fresh lime: Bottled juice works in a pinch, but fresh lime gives a brighter, cleaner flavor that really lifts the whole dish.
Don’t skip the oil: It’s not just for sticking—oil helps the spices bloom and prevents the chicken from drying out in the oven.
Cheese balance: Cheddar brings flavor, mozzarella brings texture. Using both gives you that perfect melt without overpowering the spices.
Peppers choice: Mixing colors isn’t just for looks. Red is sweeter, green is slightly bitter, and yellow sits in between. Together, they create a more balanced bite.
Onion variety: Using both red and white onions gives depth. Red turns sweet when roasted, while white keeps a bit of sharpness, which stops the dish from tasting flat.
Marinating time: Even a short rest helps, but if you have time, let the chicken sit for up to an hour. The spices and lime penetrate deeper, giving a more developed flavor throughout.
How to Make Cheesy Chicken Fajita Wraps
Prep & Season
- Step 1: Coat the chicken. In a large bowl, mix chicken thighs with all spices, lime juice, and olive oil until everything looks glossy and evenly coated. Let it sit while you prep the veg. Even 10–15 minutes helps the flavors soak in.
- Step 2: Chop the vegetables. Cut onions and peppers into even bite-size pieces so they cook at the same rate. Try not to slice them too thin or they’ll burn before they soften.
Roast the Vegetables First
- Step 3: Roast until slightly charred. Spread vegetables on a lined tray, season lightly, spray with oil, and roast at 190°C / 380°F for 20 minutes. You want edges just starting to brown and moisture mostly gone. Stir once halfway through for even roasting.
Cook the Chicken Over the Veg
- Step 4: Add chicken on top. Spread the marinated chicken over the hot vegetables. Don’t stir yet—letting it sit on top helps it roast instead of steam.
- Step 5: Bake until golden. Bake at 200°C / 400°F for 25–30 minutes until cooked through and edges turn golden. Stir once near the end if needed.
- Step 6: Broil for char. Switch to broil for 2–3 minutes. Watch closely—it goes from perfect to burnt fast. This step adds that slightly crisp finish.
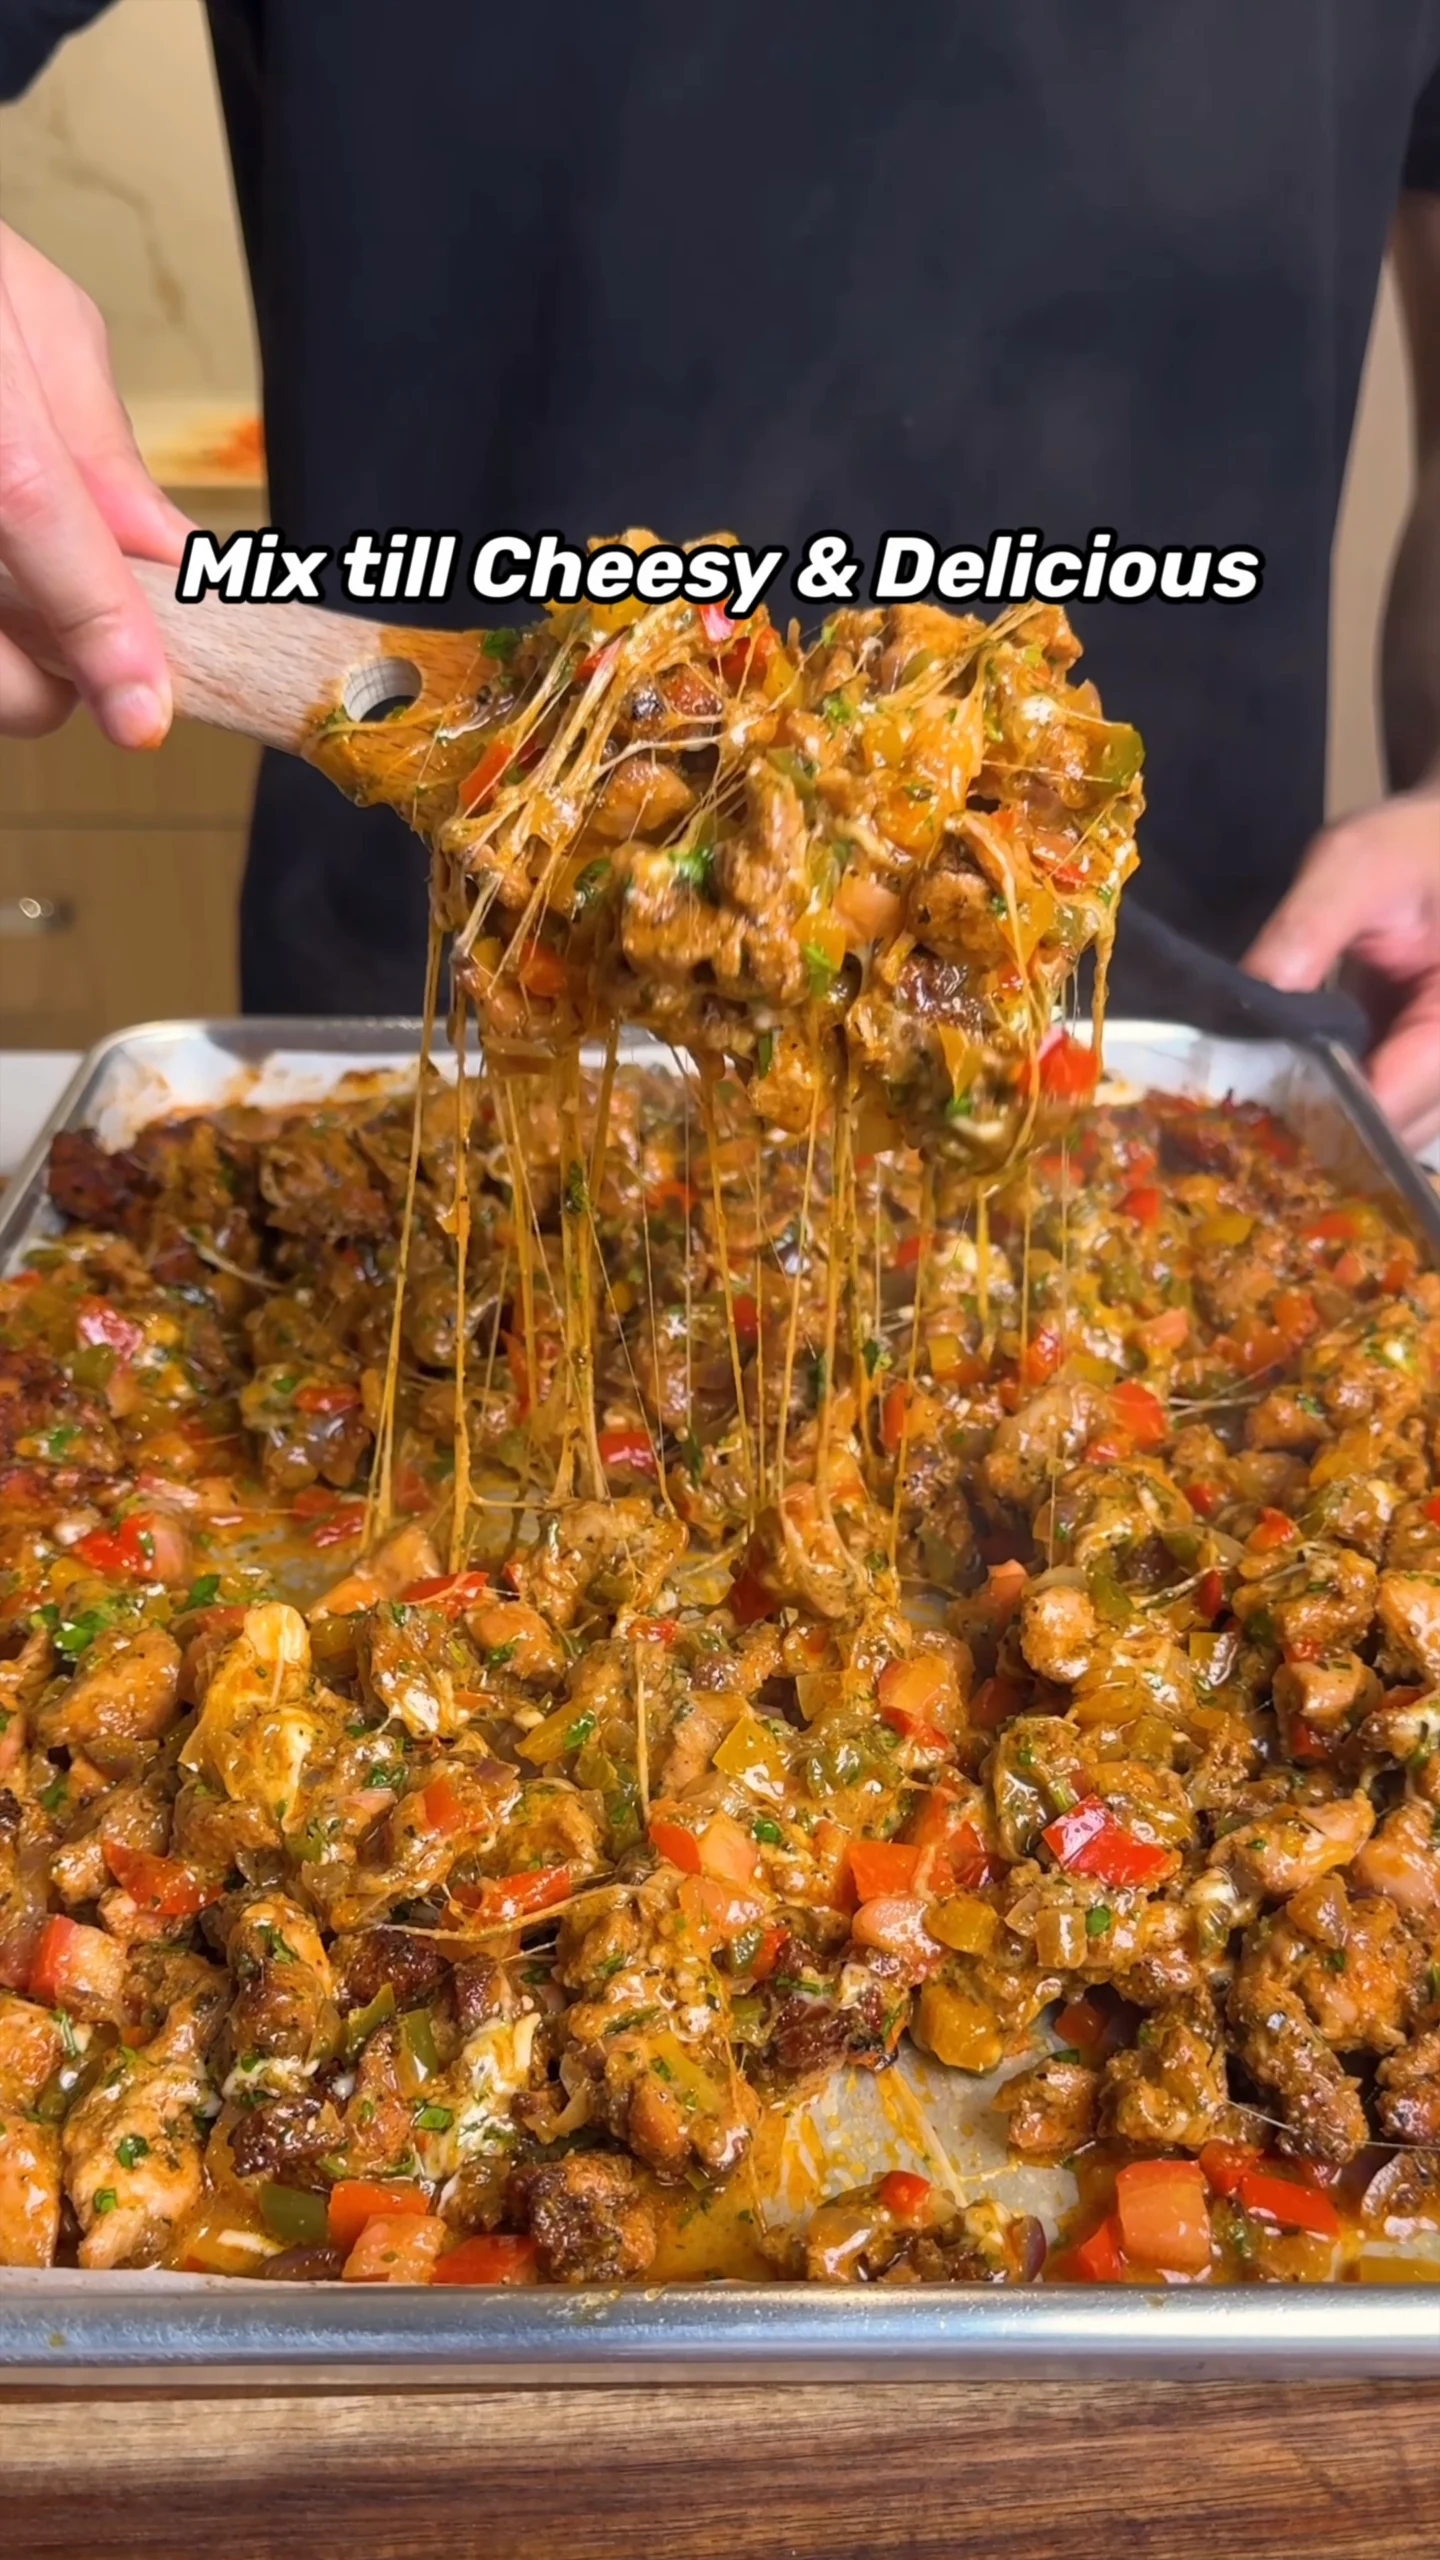
- Step 7: Add cheese and finish. While everything is hot, mix in cheese, tomatoes, and coriander. Broil again briefly until melted and bubbly.
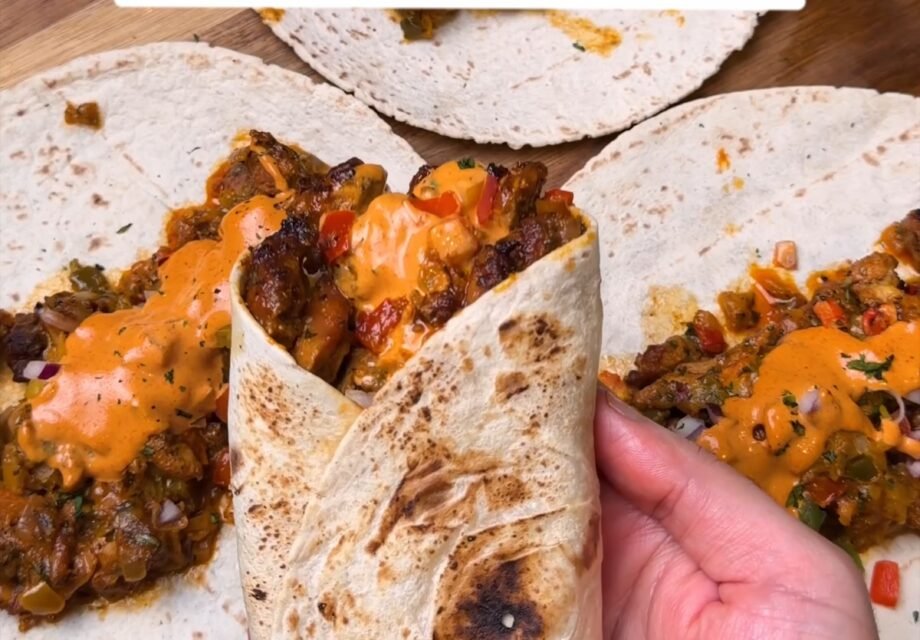
- Step 8: Build your Cheesy Chicken Fajita Wraps. Spoon into warm tortillas and roll tightly. Don’t overfill or you’ll regret it halfway through eating.
How to Get the Best Texture Every Time
Good fajita wraps are all about contrast. You want juicy chicken, soft peppers, and just a bit of char. If everything is soft, it feels heavy. If everything is dry, it’s not satisfying.
Make sure your oven is fully preheated before anything goes in. A hot oven helps the vegetables start caramelizing immediately instead of slowly releasing moisture.
Another small trick is not stirring too often. Letting the ingredients sit undisturbed gives you those browned edges. Stirring too much interrupts that process and can make everything softer than you want.
If your tray has excess liquid halfway through cooking, carefully drain a little off. This helps everything roast instead of simmer.
Using a metal sheet pan instead of glass or ceramic also makes a difference. Metal conducts heat faster and helps achieve better browning on both the vegetables and chicken.
Wrap Assembly Tips
Warm your tortillas first. This makes them flexible and less likely to tear when rolling. I usually heat them in a dry pan for 20–30 seconds per side or microwave them stacked with a damp paper towel.
Layer smart: start with chicken and veg, then sauce, then any fresh toppings. This keeps the wrap from getting soggy too quickly.
If you want a slightly crispy exterior, place the assembled wrap seam-side down in a hot pan for a minute or two. It seals everything and adds a light crunch.
For larger wraps, fold the sides in first before rolling forward. This keeps the filling from spilling out and makes them easier to eat on the go.
If packing for lunch, wrap them tightly in foil or parchment. This helps hold their shape and keeps everything intact until you’re ready to eat.
Making the Spicy Yogurt Sauce
I mix yogurt, light mayo, smoked paprika, and sriracha until smooth and slightly pink. It should taste creamy with a gentle kick, not overpowering. Let it sit in the fridge for 10–15 minutes so it settles.
If it feels too thick, add a small splash of water or lime juice. If it’s too mild, a little extra sriracha or a pinch of cayenne brings it up quickly.
If you like experimenting with sauces, I once swapped it for a quick creamy cilantro lime dressing and it worked so well with the lime in the chicken.
You can make this up to 3 days ahead, which honestly saves me on busy nights.
Flavor Variations You Can Try
Spicier version: Add sliced jalapeños before roasting or sprinkle in cayenne with the spices.
Lower carb: Skip wraps and serve over lettuce or cauliflower rice for a fajita bowl.
Extra smoky: Add a pinch of chipotle powder or a spoon of chipotle in adobo.
Different protein: Try shrimp or thinly sliced beef. Just adjust cooking time accordingly.
Loaded version: Add black beans or corn after roasting for extra texture and bulk.
Cheese swap: Pepper jack adds heat, while Monterey Jack melts smoothly if you want something milder.
Common Mistakes to Avoid
Overcrowding the tray: This is the fastest way to lose all that roasted flavor. Use space.

Skipping the broil: It seems optional, but it’s what gives the chicken those slightly crispy edges.
Adding cheese too early: It can overcook and turn greasy. Always add it at the end.
Overfilling wraps: It makes them hard to roll and messy to eat. Keep it balanced.
Under-seasoning: Because this is a large batch, seasoning needs to be bold. Taste and adjust if needed before serving.
Cold ingredients straight from the fridge: Letting the chicken sit out for 10 minutes before cooking helps it cook more evenly and prevents it from tightening up in the oven.
How to Serve It
I pile the filling into warm wraps, drizzle that sauce generously, and finish with extra coriander and a squeeze of lime. Sometimes I add a little crunch with quick pickled onions—this easy citrus pickled onion method is one I come back to.
These pair really well with a simple salad or even grilled corn. If it’s been a long day, I’ll just serve them as-is and call it done. The filling stays juicy, but don’t assemble too early or the wraps soften more than I like.
On weekends, I’ve even turned this into something inspired by spiced chicken avocado wraps by adding sliced avocado on top—so good.
You can also serve everything deconstructed and let everyone build their own wraps. It’s especially helpful if you’re feeding a group with different spice or topping preferences.
If you’re serving guests, keep the filling warm in the oven at a low temperature and lay out toppings separately. It turns into an easy, interactive meal without extra stress.
Storage and Reheating
Fridge: Store the filling in airtight containers for up to 4 days. Keep sauce separate so nothing gets soggy.
Freezer: You can freeze it for up to 2 months. The peppers soften a bit after thawing, but the flavor is still there.
Reheating: Microwave with a splash of water and cover loosely, or reheat in a skillet. I sometimes broil it for a minute at the end to bring back those crispy edges.
Tip: Always store wraps unassembled for best texture.
Make-ahead tip: You can marinate the chicken up to 24 hours in advance. This deepens the flavor and makes cooking even faster the next day.
Batch cooking: Double the recipe and freeze portions flat for quicker thawing. It’s a great way to have a ready-to-go meal on hectic days.
Portioning tip: Divide into single-meal containers so you can reheat just what you need without drying out the rest.
FAQ
Can I use chicken breast instead of thighs?
Yes, you can use chicken breast, but reduce the cooking time slightly and watch closely. Breast meat cooks faster and can dry out if overdone. I recommend checking at the 20-minute mark and pulling it once it reaches 75°C/165°F internally.
How spicy are these wraps?
They’re mild to medium as written. The chili powder and sriracha bring a gentle heat, not overwhelming. If you’re cooking for kids, reduce the chili. If you want more heat, add extra sriracha or a pinch of cayenne.
Can I make these dairy-free?
Yes, just skip the cheese or use a dairy-free alternative. The spices, lime, and roasted vegetables still carry a lot of flavor, so you won’t feel like anything is missing.
Are these good for meal prep?
They’re ideal for meal prep. The filling stays juicy and reheats well without losing texture. Assemble fresh wraps when ready to eat.
Can I cook this on the stovetop instead?
Yes. Cook the vegetables first in a large pan until slightly charred, remove, then cook the chicken. Combine at the end and melt the cheese before serving.
Related Recipes
- Air Fryer Chicken Breast
- Smash Burger Bbq Style
- Garlic Butter Steak Bites
- Cheesy Ground Beef Casserole
- Crispy Roasted Potatoes
High Protein Cheesy Chicken Fajita Wraps
- Prep Time: 10
- Cook Time: 30
- Total Time: 40
- Yield: 10 wraps 1x
- Category: Main Course
- Method: Baking, Roasting
- Cuisine: Mexican
- Diet: Low Fat
Description
Cheesy Chicken Fajita Wraps are a hearty, flavor-packed meal with juicy spiced chicken, roasted peppers, and melted cheese wrapped in soft tortillas. The sheet-pan method keeps everything caramelized and never watery, giving you bold texture and taste in every bite. These wraps are perfect for meal prep and reheat beautifully for busy days. If you enjoy easy oven meals, you might also like Baked Chicken Drumsticks.
Ingredients
- 1600 g boneless chicken thighs (cubed, skinless)
- 3 tsp salt (fine)
- 4 tsp dried oregano
- 4 tsp garlic powder
- 3 tsp ground cumin
- 3 tsp ground coriander
- 4 tsp smoked paprika (for deep flavor)
- 2–3 tsp chili powder (adjust to heat preference)
- Juice of 1 1/2 limes (freshly squeezed)
- 2.5 tbsp olive oil (for marinade)
- 200 g red onion (chopped)
- 200 g white onion (chopped)
- 150 g red bell pepper (sliced)
- 150 g green bell pepper (sliced)
- 150 g yellow bell pepper (sliced)
- Extra fajita seasoning (to taste)
- Olive oil spray (for roasting)
- 100 g low-fat cheddar cheese (grated)
- 100 g mozzarella cheese (shredded)
- 150 g fresh tomatoes (chopped)
- 2 tbsp fresh coriander (finely chopped)
- 10 low-carb tortilla wraps (soft, medium size)
- 150 g yogurt (plain, Greek or regular)
- 80 g light mayonnaise
- 1/2 tsp smoked paprika (for sauce)
- 50 g sriracha (adjust to spice level)
Instructions
- Preheat Oven: Preheat oven to 380°F (190°C) and line a large sheet pan with baking paper; the surface should feel hot when ready.
- Season Chicken: In a large bowl, mix chicken with salt, oregano, garlic powder, cumin, coriander, smoked paprika, chili powder, lime juice, and olive oil for 2–3 minutes until evenly coated and glossy.
- Prepare Vegetables: Spread onions and bell peppers on the tray, season lightly, and spray with oil; ensure they are in a single layer with space between pieces.
- Roast Vegetables: Roast at 380°F (190°C) for 20 minutes until edges are lightly browned and slightly charred, not wet.
- Add Chicken: Remove tray, spread marinated chicken evenly over vegetables, ensuring pieces are not overlapping.
- Bake Chicken: Increase heat to 400°F (200°C) and bake for 25–30 minutes until chicken reaches 165°F internally and edges are golden.
- Broil for Color: Broil on high at 450°F (230°C) for 2–3 minutes until crispy edges form and slight charring appears.
- Add Cheese: While hot, sprinkle cheddar and mozzarella evenly; let sit 2 minutes until melted and stretchy.
- Final Broil: Broil again at 450°F (230°C) for 2–3 minutes until cheese bubbles and forms golden spots.
- Prepare Sauce: Mix yogurt, mayo, smoked paprika, and sriracha until smooth and creamy; chill for 5 minutes.
- Assemble Wraps: Fill each tortilla with hot fajita mixture, fresh tomatoes, coriander, and drizzle of sauce; wrap tightly.
Notes
- Substitution: Chicken breast can be used instead of thighs, but reduce cook time by 5–7 minutes to avoid drying.
- Make-ahead: Prepare the chicken and vegetable mixture up to 3 days in advance and store refrigerated in airtight containers.
- Storage: Keep cooked filling in the fridge for up to 4 days or freeze for up to 2 months in sealed portions.
- Reheating: Reheat in a skillet over medium heat for 5–7 minutes or microwave for 2–3 minutes until steaming hot.
- Serving suggestion: Serve with extra lime wedges, avocado slices, or a side salad for a balanced meal.
Nutrition
- Array