
If you’ve ever struggled with wings that turn out soggy, unevenly cooked, or just not worth the effort, this method fixes all of that. It’s fast, reliable, and built for real kitchens on busy nights — not complicated techniques or hard-to-find ingredients. You’ll get that satisfying crunch on the outside with juicy, flavorful meat inside, every single time.
This is one of those recipes that quickly becomes a go-to. Minimal prep, quick cook time, and endlessly customizable flavors make it perfect whether you’re feeding a crowd or just craving something seriously good.
Even better, this method is consistent. Once you understand why it works — dry skin, high heat, and proper spacing — you’ll be able to repeat crispy results without guessing. No more hoping your wings turn out right. You’ll know they will.
And unlike oven methods that can take 40 minutes or more, this keeps things quick without sacrificing texture. It’s one of the fastest ways to get restaurant-style wings at home, and it works just as well for a last-minute dinner as it does for planned gatherings.
The Night I Finally Cracked Crispy Wings at Home
I’ll be honest, my first batch was…sad. Pale, a little rubbery, and my kids just stared at me like, “Mom, what happened?” I had rushed it, didn’t dry the wings properly, and skipped the baking powder because I thought it “wouldn’t matter.” It mattered.
That failure ended up being the turning point. I started paying attention to the small details — drying the wings thoroughly, spacing them out, and trusting the process instead of rushing it. The next batch? Completely different. Crispy edges, golden color, and that unmistakable crunch when you bite in.
Now I make these at least once a week, especially on those chaotic evenings when everyone’s hungry right now. The second I open the air fryer and hear that faint sizzle, I know I did it right. My kitchen smells like a wing spot, and this always disappears fast in my house.
Once you get the technique down, it’s honestly one of the easiest wins you can pull off for dinner or a snack. And the best part? No oil splatters, no heavy cleanup, and no waiting around.
It also made me realize that crispy wings aren’t about complicated tricks — they’re about doing a few simple steps correctly every single time.
Why You’ll Love This Crispy Air Fryer Chicken Wings in Under 20 Minutes
- That crispy, slightly blistered skin without dealing with hot oil splatter or a greasy mess
- Done fast — from fridge to plate in under 20 minutes, which is a lifesaver on busy nights
- Seasoning is simple but hits hard, and you can switch it up depending on your mood
- They stay juicy inside, not dried out like a lot of quick wing recipes
- Works for everything — game day, quick dinners, or when you just need something satisfying
- No complicated prep or marinating required, which keeps things stress-free
- Easy to scale up for a crowd or keep small for a quick snack
- Cleaner cooking compared to oven baking or frying, with less lingering smell
- Reliable results even if you’re new to using an air fryer
- Consistent crispiness without flipping constantly or babysitting the process
What You’ll Need
Main Protein
- Chicken wings (1 lb): Go for split wings (flats and drumettes). They cook more evenly and give you more crispy surface area, which is exactly what we want here. If you buy whole wings, simply cut them at the joints and discard the tips. Try to choose wings that are similar in size so they cook at the same rate. Smaller wings cook faster and crisp more easily, while larger ones may need an extra minute or two.
Liquid / Fat
- Avocado oil (2 tablespoons): Helps the seasoning stick and encourages browning. This is the one I always reach for because it handles high heat without smoking up my kitchen. You can also use light olive oil if that’s what you have. Avoid heavy oils with strong flavor, which can overpower the seasoning. A light, even coating is enough — too much oil can actually reduce crispiness.
Spices
- Baking powder (½ teaspoon): This is the secret. It dries out the skin and helps it crisp up instead of staying soft. Make sure it’s aluminum-free to avoid any bitter aftertaste. Use just enough — too much can leave a chalky taste.
- Smoked paprika (¼ teaspoon): Adds that subtle smoky edge and gives the wings a deeper color.
- Garlic powder (¼ teaspoon): Brings that savory backbone you expect in good wings.
- Onion powder (¼ teaspoon): Rounds everything out so it doesn’t taste flat.
- Dried parsley (¼ teaspoon): Light freshness — small but noticeable.
- Salt and pepper: Don’t skip or go light. This is what makes everything pop. Kosher salt works especially well for even seasoning. If using fine salt, reduce slightly to avoid over-salting.
Toppings
- Buffalo sauce, ranch, or blue cheese: Toss or dip — both work. I switch depending on the mood.
- Optional fresh herbs or flaky salt: That little finishing touch makes them feel extra special.
- Lemon wedges: A quick squeeze at the end brightens everything up and balances the richness.
How to Make Crispy Air Fryer Chicken Wings in Under 20 Minutes
Prep & Season
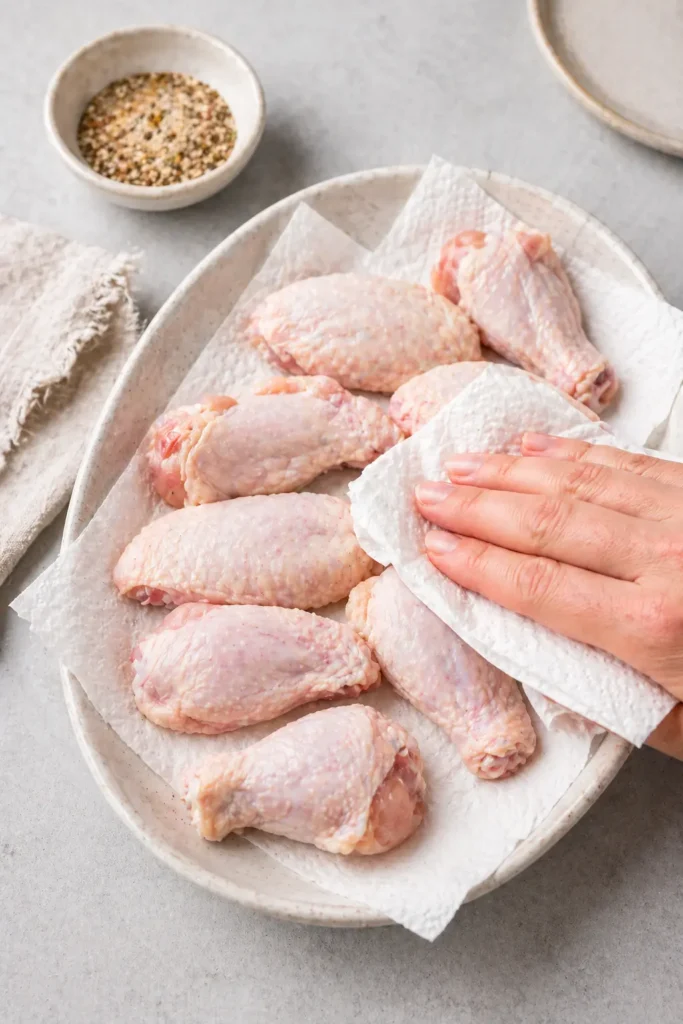
- Step 1: Pat Completely Dry
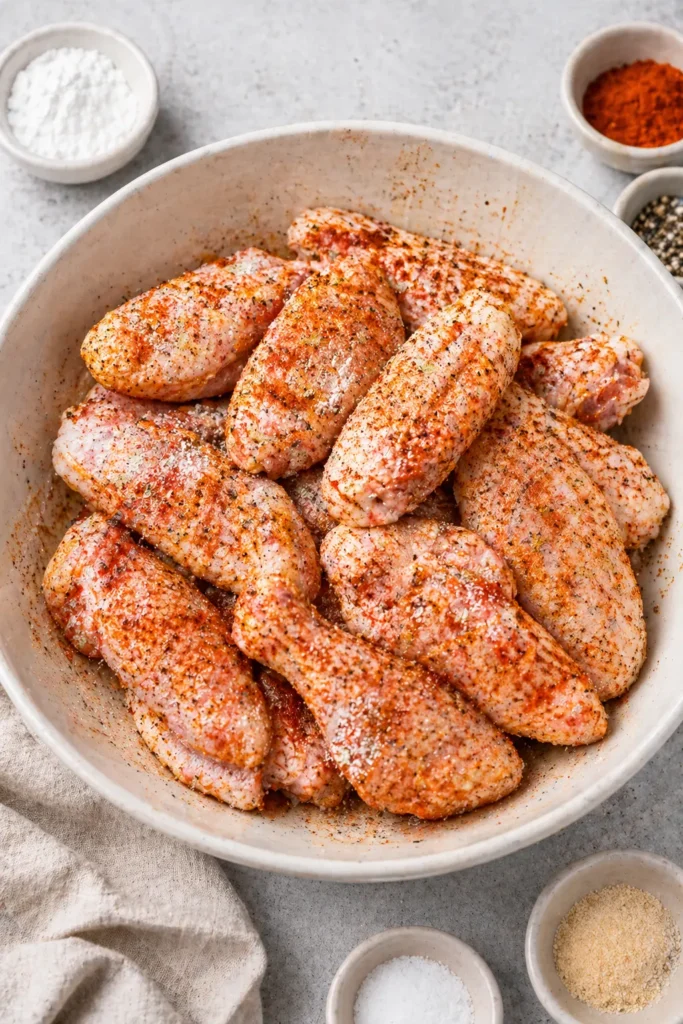
Use paper towels and really press into the wings. They should feel dry, not damp. If there’s moisture, they’ll steam instead of crisp — and that’s exactly what went wrong my first time. If you have extra time, let them sit uncovered in the fridge for 30–60 minutes to dry even more. This step alone can dramatically improve texture and is worth it if you can plan ahead. - Step 2: Coat and Season
Toss the wings with avocado oil, baking powder, and all the spices. Make sure everything is evenly coated. Break up any clumps of baking powder — you don’t want bitter spots. Every wing should have a light, even coating, not a thick paste. Use your hands or a large bowl to get full coverage. Taking an extra 30 seconds here prevents uneven flavor later.
Air Fry to Crispy Perfection
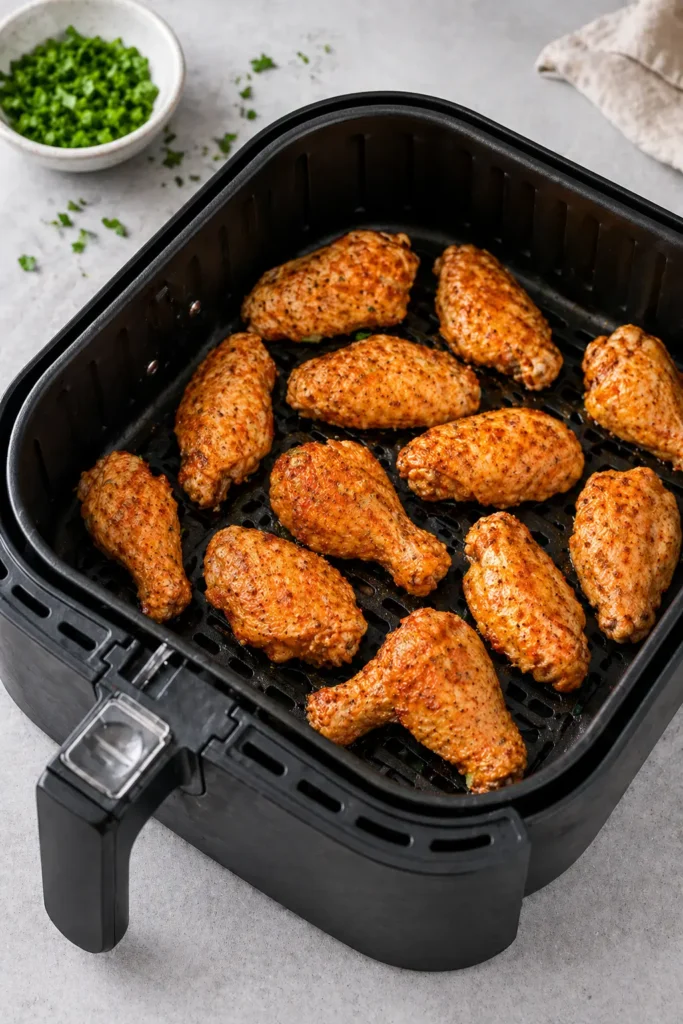
- Step 3: First Cook
Preheat your air fryer to 380°F. Lay the wings in a single layer with space between them. Cook for 10 minutes until they start turning golden and the skin tightens. You’ll notice the fat beginning to render — that’s a good sign. Avoid opening too often so the heat stays consistent. If your air fryer runs cool, you may need an extra minute. - Step 4: Flip and Finish
Flip each wing and cook another 8 minutes. You’re looking for deep golden color with slightly blistered edges and a dry, crispy surface. If you want them extra crispy, add 2 more minutes at 400°F right at the end. Keep an eye on them during the final minutes so they don’t overbrown. The edges should look crisp but not burnt.
Finish & Serve
- Step 5: Sauce or Serve Plain
Serve immediately, or toss in sauce while hot so it sticks better. Taste one (careful, it’s hot), adjust salt if needed, and go from there. If using sauce, toss quickly to avoid softening the crust too much. For best results, use a large bowl and gentle tossing motion instead of stirring.
Don’t overcrowd the basket — I know it’s tempting, but packed wings = soft wings. Cook in batches if needed. Trust me, this one is worth it.
If you’re cooking for a group, keep finished wings warm in a low oven (around 200°F) on a rack while the next batch cooks. This keeps them crisp instead of soggy.
Pro Tips for Extra Crispy Wings
- Let wings sit at room temperature for 10 minutes before cooking to promote even cooking
- Shake the basket lightly halfway through if your air fryer tends to have hot spots
- Use a rack insert if your air fryer has one for better airflow underneath
- Avoid sugary sauces during cooking — add them after to prevent burning
- Cook in batches rather than stacking — airflow is everything for crispiness
- Preheat fully so the wings start crisping immediately on contact
- Use aluminum-free baking powder to avoid any off flavors
- Flip carefully to keep the seasoned coating intact
Flavor Variations to Try
Once you’ve mastered the base recipe, it’s easy to switch things up without changing the cooking method.
- Classic Buffalo: Toss in warm buffalo sauce and finish with a little melted butter
- Honey Garlic: Sweet, sticky, and kid-friendly with bold flavor
- Lemon Pepper: Bright, zesty, and perfect if you want something lighter
- Dry Rub BBQ: Add brown sugar, chili powder, and smoked paprika before cooking
- Spicy Cajun: Use Cajun seasoning for a bold, slightly spicy kick
- Garlic Parmesan: Toss with melted butter, garlic, and grated parmesan after cooking
- Teriyaki Glaze: Brush lightly after cooking for a sweet and savory finish
You can also mix and match — like doing half buffalo and half garlic parmesan — which makes these perfect for sharing.
How to Serve It
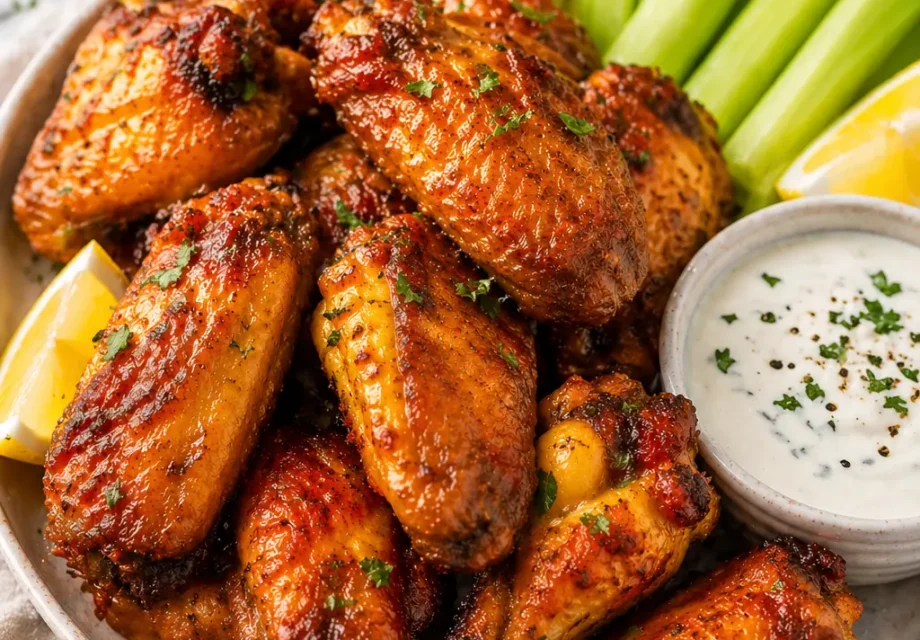
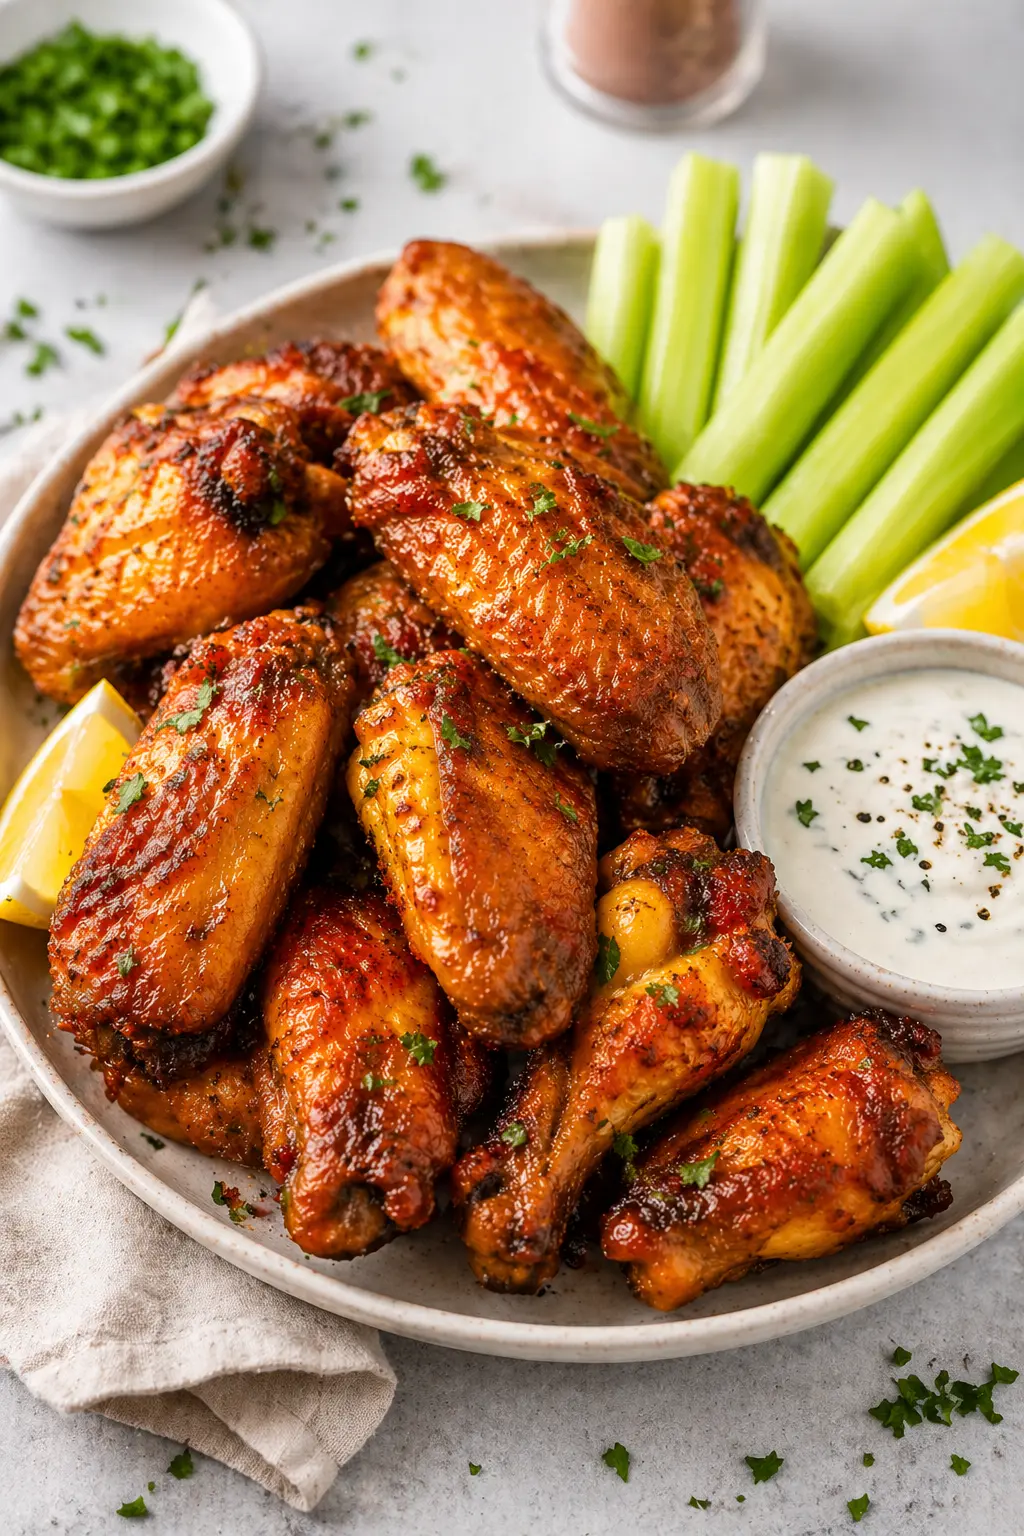
These come out best straight from the air fryer — crispy on the outside, juicy inside, with that light crunch when you bite in.
I usually pile them onto a big plate with ranch or blue cheese and some celery sticks for that classic combo. If I’m feeling extra, I’ll brush them with sauce or pair them with something like this tangy homemade BBQ sauce for grilling season for a sticky, sweet finish.
They also go great with fries, roasted potatoes, or even a quick salad on the side to balance things out. For gatherings, serve them family-style with multiple sauces so everyone can mix and match.
If you want to turn this into a full meal, pair with coleslaw, corn on the cob, or a simple rice bowl for something more filling. You can even slice the cooked wings off the bone and add them to wraps or salads for leftovers.
For game day, serve with a mix of dipping sauces and crunchy sides so people can build their own plate.
Storage and Reheating
Fridge: Store in an airtight container for up to 3 days. Let them cool completely before sealing so they don’t trap steam.
Freezer: You can freeze them for up to 2 months, but the skin won’t be quite as crisp after thawing.
Reheating: Air fry at 375°F for 4–6 minutes. They crisp right back up. Avoid the microwave unless you’re okay with softer skin.
Tip: Keep sauce separate if possible — it helps maintain that crispy texture.
If reheating from frozen, let them thaw in the fridge overnight first for best results, then reheat as usual. You can also add an extra minute or two at a higher temperature to bring back that crisp edge.
For best texture, avoid stacking wings during storage — keeping them in a single layer helps preserve the skin.
Troubleshooting Common Issues
Wings aren’t crispy enough: Most likely too much moisture or overcrowding. Dry thoroughly and cook in a single layer.
Uneven cooking: Flip carefully and consider rotating the basket if your air fryer has hot spots.
Bitter taste: Too much baking powder or uneven mixing. Use a light hand and distribute evenly.
Skin burning before inside cooks: Lower temperature slightly and extend cook time by a couple minutes.
Wings sticking to basket: Lightly spray the basket or ensure enough oil coating on the wings.
Not enough browning: Increase final temperature slightly or extend cooking time by 1–2 minutes.
FAQ
Can I make these wings without baking powder?
Yes, but you’ll miss that crispy texture. Baking powder helps dry the skin and promotes browning, which gives that crackly finish. Without it, the wings will still taste good, just softer and less crisp.
Why aren’t my wings crispy?
Most of the time it comes down to moisture or overcrowding. If the wings aren’t fully dried or are packed too tightly, they steam instead of crisp. Give them space and start with dry skin.
Can I cook frozen wings in the air fryer?
You can, but add about 5–8 extra minutes and expect slightly less crispiness. For best results, thaw first and pat dry before seasoning and cooking.
What sauces work best with these wings?
Buffalo is classic, but honey garlic is a favorite in my house — especially using something like this quick honey garlic chicken sauce idea. Even a creamy dip like this cilantro lime dressing works surprisingly well.
Do I need to preheat the air fryer?
Yes, preheating helps the wings start crisping immediately instead of slowly warming up, which can lead to softer skin.
How do I know when wings are fully cooked?
The internal temperature should reach 165°F, and the juices should run clear. The outside should be golden and crisp.
Related Recipes
- Air Fryer Chicken Breast
- Air Fryer Chicken Breast 3 Secrets To Juicy Perfection
- Air Fryer Patatas Bravas
- Honey Garlic Sauce
- Crispy Roasted Potatoes
Crispy Air Fryer Chicken Wings in Under 20 Minutes Recipe
- Prep Time: 10
- Cook Time: 30
- Total Time: 40
- Yield: 4 servings 1x
- Category: Appetizer
- Method: Air Frying
- Cuisine: American
- Diet: Gluten Free
Description
These crispy air fryer chicken wings deliver golden, crackly skin with juicy meat in every bite, all without deep frying. With a simple seasoning blend and a quick cooking method, they come together fast and reliably for weeknights or game day. The baking powder trick ensures maximum crispiness while keeping the inside tender. If you enjoy bold wing flavors, you can also explore variations like Bbq Wings for a saucy twist.
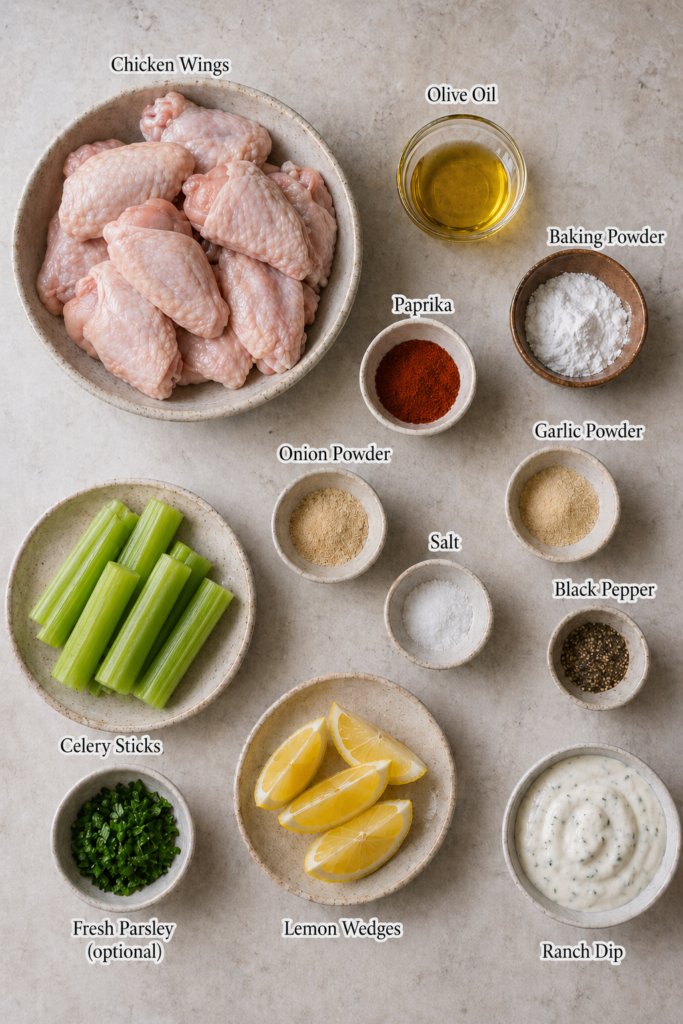
Ingredients
- 1 lb chicken wings (split into flats and drumettes, patted very dry)
- 2 tablespoons avocado oil (or any high smoke point oil)
- 1/2 teaspoon baking powder (aluminum-free for best taste)
- 1/4 teaspoon smoked paprika (adds mild smoky flavor)
- 1/4 teaspoon garlic powder (finely ground)
- 1/4 teaspoon onion powder (for depth of flavor)
- 1/4 teaspoon dried parsley (optional garnish)
- 1/2 teaspoon salt (adjust to taste)
- 1/4 teaspoon black pepper (freshly ground preferred)
Instructions
- Prep Wings: Pat chicken wings completely dry with paper towels for 3 minutes until no visible moisture remains; dry skin ensures crisping at 380°F.
- Preheat Air Fryer: Preheat air fryer to 380°F for 5 minutes until fully heated and air is circulating evenly.
- Season Base: In a bowl, toss wings with avocado oil for 1 minute until evenly coated and slightly glossy.
- Add Coating: Sprinkle baking powder, paprika, garlic powder, onion powder, parsley, salt, and pepper; toss for 2 minutes until evenly distributed and lightly pasty.
- Arrange Wings: Place wings in a single layer in the air fryer basket, leaving space between pieces; overcrowding prevents crisping.
- First Cook: Cook at 380°F for 10 minutes until skin begins to tighten and turn pale golden.
- Flip Wings: Turn each wing using tongs; surfaces should look slightly crisp and rendered.
- Second Cook: Continue cooking at 380°F for 8–10 minutes until wings are deep golden brown with visibly crispy edges and internal temperature reaches 165°F.
- Rest and Serve: Let wings rest for 2 minutes until juices settle; serve hot with sauces or enjoy plain with crisp, crackly skin.
Notes
- Substitutions: Use olive oil instead of avocado oil; replace parsley with thyme or omit entirely.
- Make-Ahead: Season wings up to 12 hours ahead and store uncovered in the fridge for even crispier skin.
- Storage: Store leftovers in an airtight container in the refrigerator for up to 4 days.
- Reheating: Reheat in air fryer at 375°F for 5–6 minutes until hot and re-crisped.
- Serving Ideas: Pair with celery sticks, carrot sticks, and dips like ranch, blue cheese, or buffalo sauce.
- Crispiness Tip: Always use baking powder and ensure wings are fully dry before cooking.
Nutrition
- Array
Actually crispy for once
I followed the tip about making sure the chicken skin was really dry before air frying, and wow, the crackly texture was real. Cooked in just under 20 minutes and came out juicy inside, no soggy spots at all.
★★★★★